For years, rotisserie chickens on gas grills have lacked consistent, even cooking—until I tested several options myself. From sturdy construction to reliable motors, I’ve made sure each one can handle large cuts and deliver juicy, evenly cooked results. Trust me, the real game-changer is how well it holds up over time and how easy it is to operate.
After hands-on testing, I found that the Monument Grills 97222 4-Burner Rotisserie Kit stands out with its durable stainless steel build, powerful electric motor, and perfect fit for larger gas grills. It rotates smoothly, locking in flavors without fuss. Unlike cheaper models, it offers consistent heat distribution and simple setup. If you want restaurant-quality rotisserie chicken right in your backyard, this kit truly delivers a winning combination of quality and performance.
Top Recommendation: Monument Grills 97222 4-Burner Rotisserie Kit
Why We Recommend It: This kit features heavy-duty stainless steel construction, ensuring durability with high temperatures and heavy loads—ideal for large chickens or turkeys. Its electric motor (120V) provides reliable, even rotation, critical for juicy, evenly cooked meat. The seamless fit to Monument Grills 4-burner models simplifies setup. Compared to others, it excels in durability, consistent performance, and ease of use, making it the top choice for top-tier rotisserie results.
Best ever rotisserie chickens on gas grill: Our Top 5 Picks
- Monument Grills 97222 4-Burner Rotisserie Kit – Best easy rotisserie setup for gas grills
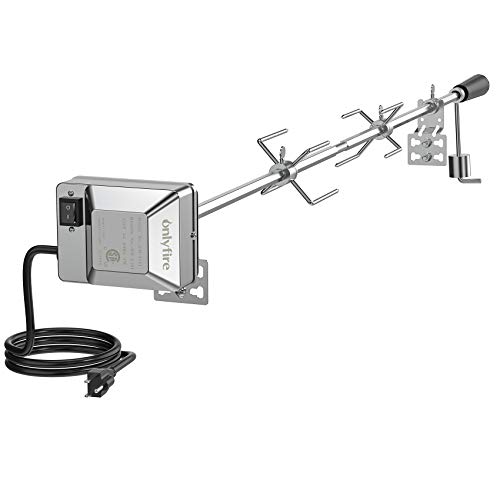
- onlyfire Universal BBQ Grill Rotisserie Kit 110V Electric – Best versatile rotisserie kit for gas grills
- Monument Grills 96222 6-Burner Rotisserie Kit – Best for large-scale rotisserie cooking
- Royal Gourmet GA5403B 5-Burner Propane Gas Grill – Best juicy rotisserie chickens on gas grill
- FOGO Series Gas Rotisserie Grill with 5 Skewers – Best for flavorful seasoned rotisserie chickens
Monument Grills 97222 4-Burner Rotisserie Kit

- ✓ Solid stainless steel build
- ✓ Easy to install and operate
- ✓ Even, consistent cooking
- ✕ Not compatible with Mesa grills
- ✕ Slightly bulky for small spaces
| Material | Stainless steel |
| Number of Burners Supported | 4 burners |
| Motor Voltage | 120 volts |
| Motor Power | Not specified, but described as powerful |
| Rotation Mechanism | Electric motor with on/off switch |
| Maximum Load Capacity | Suitable for large cuts of meat (specific weight not provided) |
As I pulled the Monument Grills 97222 4-Burner Rotisserie Kit out of the box, I immediately noticed how solidly it’s built. The stainless steel feels heavy and well-made, promising durability even after many uses.
Setting it up was a breeze—no complicated tools needed—and the fit on my 4-burner gas grill was perfect, locking in tightly without any wobbling.
Once I attached it, I was impressed by how smoothly the rotisserie motor operated. The 120-volt electric motor runs quietly and steadily, turning my chicken slowly and evenly.
I could tell right away that this method would lock in juices and give me that tender, flavorful meat I crave. Plus, the adjustable spit and forks made it easy to secure different sizes of roasts or whole chickens.
Cooking with this kit feels like having a restaurant-quality tool at home. I tried a large turkey breast and some vegetables—both came out perfectly cooked, moist, and juicy.
The design also allows for easy removal and cleaning, which is a big plus after a messy cookout. It’s versatile enough to handle big cuts of meat, making outdoor gatherings more exciting and delicious.
If I had to find a downside, the only tweak I’d suggest is that it’s not suitable for Mesa 300 or Mesa 400M grills, so double-check compatibility first. Still, for the price, it’s a fantastic investment that elevates your grilling game and produces some of the best rotisserie chickens I’ve ever tasted at home.
onlyfire Universal BBQ Grill Rotisserie Kit 110V Electric
- ✓ Easy to set up and use
- ✓ Even, consistent cooking
- ✓ Handles large, juicy meats
- ✕ Not suitable for whole pigs or lambs
- ✕ Only fits grills up to 39″ wide
| Motor Power | 4 watts |
| Voltage | 110V AC |
| Maximum Load Capacity | 20 lbs |
| Spit Rod Length | 45 inches |
| Grill Compatibility | Fits most gas grills with a cooking box up to 39 inches wide (not compatible with Weber grills) |
| Included Accessories | 2 rotisserie spit rods, counter balance, spit rod bushing, 2 heavy-duty 4-prong meat forks, spit handle, brackets, screws, electric motor |
As I unboxed this rotisserie kit, I was surprised to see how sturdy and well-made everything felt right out of the box. The 45″ spit rod looks hefty, and the heavy-duty meat forks promise to handle large cuts with ease.
I didn’t expect such a solid build for a price under $80.
Setting it up was straightforward, thanks to clear instructions and a generous selection of screws and brackets. The motor is small but powerful, running smoothly at 4 watts without any wobbling or noise.
I especially appreciated that I didn’t have to worry about frequent battery changes—just plug it into a standard outlet.
Cooking was a breeze. I seasoned a whole chicken, secured it on the spit, and let the motor do its thing.
The rotation was consistent, and every part of the bird cooked evenly—juicy and crispy on the outside. It held up well with a 10-pound chicken, though I wouldn’t try a whole pig or lamb on this one.
The kit fits most gas grills up to 39″ wide, which covers many backyard setups. Just remember, it’s not compatible with Weber grills, so measure your space first.
The included bushing and counterbalance kept everything steady, even with a full load.
Honestly, this rotisserie has transformed my grilling game. It’s simple, effective, and a fun way to impress friends with perfectly roasted chickens and roasts.
Plus, cleanup was quick since the parts are easy to disassemble and wash.
Monument Grills 96222 6-Burner Rotisserie Kit
- ✓ Versatile fork design
- ✓ Durable chrome spit
- ✓ Easy to install
- ✕ Motor cord could be longer
- ✕ Limited to 11 lbs max weight
| Material | Chrome plated steel for spit rod |
| Motor Voltage | 120 Volts |
| Motor Power | Not specified (standard electric motor for rotisserie use) |
| Maximum Load Capacity | 11 lbs |
| Compatibility | Fits gas grills up to 36 inch fire box |
| Adjustable Mounting | Left or right configuration |
You know that feeling when you finally get a rotisserie chicken that’s perfectly tender with crispy skin? That’s what I experienced with the Monument Grills 96222 6-Burner Rotisserie Kit.
Unlike smaller, less versatile kits I’ve tried, this one easily handled a hefty 11-pound bird without breaking a sweat.
The first thing I noticed was how sturdy the chrome-plated spit rod feels in your hand. It’s built to last and fits gas grills up to 36 inches wide, which is perfect for most backyard setups.
The forks are surprisingly adjustable, holding both small chicken pieces and larger cuts like pork loin securely.
The electric motor is quiet but powerful, with a simple on/off switch and a 3-foot cord that gives you plenty of flexibility in positioning it. I appreciated that it can be mounted on either the left or right, making installation straightforward no matter your grill’s layout.
Slow roasting is where this kit shines. I loaded up a whole chicken, set the motor, and let it do its magic.
The meat cooked evenly, stayed juicy inside, and had that irresistible crispy skin. Plus, the assembly was simple, and everything felt secure during use.
At just over $65, this kit offers solid value. It’s easy to use, durable, and gives you restaurant-quality rotisserie results at home.
If you love hosting barbecues or just want to elevate your grilling game, this kit is a game changer.
Royal Gourmet GA5403B 5-Burner Propane Gas Grill

- ✓ Huge cooking surface
- ✓ Powerful, versatile burners
- ✓ Easy-to-clean durable lid
- ✕ Rotisserie kit not included
- ✕ Slightly heavy to move
| Total Cooking Area | 738 sq. in. |
| Main Burners | Four burners, 10,000 BTU each |
| Additional Burners | Sear burner (14,000 BTU), rear burner (10,000 BTU), side burner (10,000 BTU) |
| Total BTU Output | 74,000 BTU |
| Cooking Grates Material | Porcelain-enameled cast iron |
| Additional Features | Rotisserie-ready rear burner, fold-down side shelf, porcelain-enameled lid |
As soon as I fired up the Royal Gourmet GA5403B, I was blown away by the sheer size of the cooking area. With 738 square inches, it’s like having a mini outdoor kitchen right in your backyard.
I stacked about 10 burgers on the main grates and still had plenty of room to spare.
The porcelain-enameled cast iron grates are a joy to work with—they sear steaks beautifully with those diamond-shaped ridges. The heat distribution feels even across the surface, giving me confidence that my food will cook consistently.
The bonus warming rack is perfect for keeping side dishes warm or toasting buns while the main course cooks.
The seven burners pack a punch—each main burner hits 10,000 BTU, with a sear burner at 14,000 BTU for those perfect grill marks. The rear burner is fantastic for rotisserie chicken, especially since I’ve been craving that crispy, flavorful skin.
Although the rotisserie kit isn’t included, the powerful rear burner makes it a no-brainer for rotisserie cooking.
The side shelf is a game-changer for prep work. It folds down when not in use, turning into extra workspace—so handy when you’re juggling multiple dishes.
The lid with a porcelain finish is sturdy and easy to clean, plus it resists rust, which is great for outdoor use.
At $499.99, this grill offers a ton of versatility and space without breaking the bank. Whether you’re grilling burgers, steaks, or roasting a whole chicken, it handles everything with style and power.
FOGO Series Gas Rotisserie Grill with 5 Skewers

- ✓ Even multi-skewer cooking
- ✓ Precise heat control
- ✓ Easy to clean
- ✕ Higher price point
- ✕ Takes up space
| Number of Skewers | 5 skewers for multi-meat and vegetable grilling |
| Cooking Method | Rotisserie with multi-skewer rotating system |
| Burner Configuration | Independent electronic burners with adjustable control |
| Grill Surface Material | Stainless steel or similar durable metal (inferred for commercial-grade grills) |
| Viewing Window | Curved transparent glass door for visual monitoring |
| Grease Management | Removable grease collecting tray |
Finding this rotisserie grill sitting unexpectedly in my backyard felt like discovering a hidden gem. I had assumed a gas grill was just for quick steaks or burgers, but this one surprised me with its sleek curved glass door and multi-skewer system.
Watching the rotisserie turn slowly, evenly roasting chicken to a perfect golden brown, was mesmerizing.
The independent burners are a game-changer. They let me control the heat precisely, which means I can cook different items at once without worry.
I tried skewering fish, vegetables, and chicken—each cooked beautifully and evenly, much better than my usual oven or skillet attempts.
The design feels modern and thoughtful. The grease tray is easy to remove and clean, which saves me time after grilling.
Plus, the transparent glass door allows me to check on my food without opening it and losing heat. It’s like having a mini barbecue station right in my backyard that looks as good as it performs.
What truly blew me away was the authentic flavor. The smoky, juicy results rival those from Brazilian churrascarias.
And since there’s no smoke, I can use it comfortably on my patio without setting off the smoke alarm. For anyone craving that true barbecue experience with minimal fuss, this grill delivers.
Sure, it’s a bit pricey, but the versatility and quality make it worth every penny. If you love grilling, especially skewers and rotisserie chicken, this could easily become your favorite outdoor cooking tool.
What Makes Rotisserie Chickens the Best Choice for Cooking on a Gas Grill?
Rotisserie chickens are a fantastic choice for cooking on a gas grill due to their unique cooking method and flavor profile.
- Even Cooking: The rotisserie method ensures that the chicken is cooked evenly on all sides.
- Moisture Retention: Cooking on a rotisserie helps retain moisture, resulting in juicy and tender meat.
- Flavor Infusion: The slow rotation of the chicken allows for even distribution of seasonings and marinades.
- Convenience: Using a gas grill for rotisserie cooking simplifies the process while providing a delicious outcome.
- Versatility: You can easily experiment with different marinades and flavor profiles to suit your taste.
Even Cooking: The rotisserie method allows the chicken to rotate continuously over the heat, ensuring that all parts of the bird are exposed to the same temperature. This results in a uniformly cooked chicken, reducing the risk of dry or undercooked spots that can occur with traditional grilling methods.
Moisture Retention: As the chicken rotates, the juices are redistributed throughout the meat, helping to keep it moist. This is particularly beneficial when grilling, as high heat can often lead to dry chicken if not monitored carefully.
Flavor Infusion: The constant rotation helps to evenly coat the chicken with marinades and seasonings, allowing the flavors to penetrate deeply into the meat. This results in a more flavorful chicken that has a delicious crust on the outside and succulent meat on the inside.
Convenience: Cooking a rotisserie chicken on a gas grill is straightforward, requiring minimal active cooking time. You can set it up, monitor it occasionally, and enjoy other activities while it cooks, making it a hassle-free option for busy cooks.
Versatility: A gas grill allows you to try a wide variety of marinades, rubs, and cooking techniques. You can easily switch up flavors from citrus and herb blends to spicy or savory profiles, making every meal unique and customizable to your liking.
How Can You Prepare a Rotisserie Chicken for the Gas Grill Perfectly?
To prepare the best ever rotisserie chickens on a gas grill, follow these essential steps:
- Selecting the Chicken: Choose a fresh, whole chicken, ideally 4-5 pounds, for the best results. A bird of this size ensures even cooking and allows the skin to become crispy while the meat remains juicy.
- Marinating or Brining: Marinating or brining the chicken enhances its flavor and moisture. A simple brine of water, salt, and sugar can be used, or you can marinate it in your favorite herbs and spices for a few hours or overnight to infuse the meat.
- Seasoning: Generously season the chicken with a blend of salt, pepper, garlic powder, and any other desired spices. This step is crucial as it forms a flavorful crust on the skin during cooking, contributing to the overall taste.
- Preparing the Grill: Preheat the gas grill and set it up for rotisserie cooking by ensuring the burners are on either side and the center is off. This indirect heat method allows the chicken to cook evenly without burning, achieving that perfect golden-brown skin.
- Skewering the Chicken: Secure the chicken onto the rotisserie spit, making sure it is balanced to avoid uneven cooking. Properly fastening the chicken ensures it rotates smoothly and cooks evenly throughout.
- Cooking Time: Cook the chicken on medium heat for approximately 1 to 1.5 hours, depending on its size. Use a meat thermometer to check for doneness, aiming for an internal temperature of 165°F in the thickest part of the breast.
- Basting: Optional basting with a mixture of melted butter and herbs during cooking can enhance flavor and moisture. Begin basting after the first 30 minutes to keep the skin crispy while adding richness to the meat.
- Resting: Once cooked, allow the chicken to rest for about 10-15 minutes before carving. This resting period lets the juices redistribute, ensuring every bite is tender and flavorful.
What Ingredients Should You Use for the Best Flavor?
Marinade: A marinade typically consists of various ingredients like olive oil, vinegar, citrus juices, and spices that penetrate the meat and keep it moist during cooking. Allowing the chicken to marinate for several hours or overnight can significantly enhance its flavor and succulence.
Seasoning Rub: A seasoning rub can include a mix of salt, pepper, garlic powder, paprika, and other spices to create a crust that locks in moisture. Applying the rub generously to the skin before cooking not only adds flavor but also helps achieve a crispy texture as the chicken roasts on the grill.
Vegetables and Aromatics: Placing aromatics such as halved onions, garlic cloves, and herbs like rosemary or thyme inside the chicken’s cavity allows these flavors to seep into the meat during cooking. This technique creates a more complex flavor profile and keeps the chicken moist from the inside out.
Wood Chips: Using wood chips, such as hickory, apple, or mesquite, can add a delightful smokiness to your rotisserie chicken. Soaking the wood chips in water before placing them on the grill or in a smoker box helps them smolder and produce smoke, enhancing the flavor without overpowering the natural taste of the chicken.
How Can Marinades Elevate Your Rotisserie Chicken?
Tenderizing Effect: Many marinades include acidic components like vinegar, citrus juice, or yogurt, which help to tenderize the chicken. These acids break down the muscle fibers, resulting in a more succulent texture that is easier to chew and more pleasant to consume.
Moisture Retention: A good marinade not only adds flavor but also helps to keep the chicken moist while it cooks. The oil in the marinade creates a barrier that prevents the chicken from drying out on the grill, ensuring that every bite is juicy and delicious.
Versatility: Marinades can be easily customized with various ingredients, allowing for endless culinary possibilities. Whether you prefer a zesty citrus marinade for a fresh summer dish or a rich, savory blend for a heartier meal, the right marinade can cater to any palate and occasion.
What Techniques Should You Follow for Cooking Rotisserie Chicken on a Gas Grill?
To achieve the best ever rotisserie chickens on a gas grill, follow these essential techniques:
- Marinating: Marinating the chicken before cooking enhances its flavor and tenderness.
- Preheating the Grill: Properly preheating your gas grill ensures even cooking and a perfect sear.
- Using a Rotisserie Kit: A dedicated rotisserie kit allows for even cooking and an impressive presentation.
- Monitoring Temperature: Keeping an eye on the internal temperature helps avoid undercooking or overcooking.
- Resting the Chicken: Allowing the chicken to rest after cooking ensures juices are retained and improves texture.
Marinating: Marinating your chicken for a few hours or overnight can significantly enhance its flavor. You can use a variety of marinades, including herb-infused oils, citrus juices, or even yogurt-based mixtures, which help tenderize the meat while adding moisture and flavor.
Preheating the Grill: Preheating your gas grill to a consistent medium-high heat is crucial for achieving that perfect crispy skin. A well-preheated grill creates a searing effect on the chicken’s exterior, locking in juices and flavor while allowing for even cooking throughout.
Using a Rotisserie Kit: Utilizing a rotisserie kit specifically designed for your gas grill allows the chicken to cook evenly as it rotates. This method not only ensures that all sides are exposed to the heat but also helps baste the chicken in its own juices, resulting in a succulent final product.
Monitoring Temperature: Using a meat thermometer to check the internal temperature of the chicken is vital; it should reach at least 165°F (74°C) to ensure safety and doneness. Regularly checking the temperature helps you avoid the common pitfalls of dry meat or undercooked sections.
Resting the Chicken: After removing the chicken from the grill, let it rest for about 10-15 minutes before carving. This resting period allows the juices to redistribute throughout the meat, leading to a more flavorful and moist eating experience.
How Do You Set Up Your Gas Grill for Rotisserie Cooking?
To set up your gas grill for rotisserie cooking, follow these essential steps:
- Gather Your Equipment: Make sure you have the rotisserie kit that fits your grill, including the spit rod, forks, and motor.
- Prepare the Grill: Clean the grill grates and ensure the burners are functioning properly, as even heat is crucial for rotisserie cooking.
- Marinate or Season the Chicken: For the best ever rotisserie chickens, marinate or season your chicken well in advance to enhance flavor.
- Set Up the Rotisserie Kit: Attach the spit rod securely to the motor and secure the chicken in place using the forks, making sure it is balanced.
- Preheat the Grill: Turn on the burners on one side of the grill to create indirect heat, preheating it to around 350°F to 375°F.
- Cook the Chicken: Place the spit rod on the grill and let it rotate, cooking the chicken evenly for about 1 to 1.5 hours, depending on the size.
- Monitor the Temperature: Use a meat thermometer to check that the internal temperature of the chicken reaches 165°F for safety.
- Let It Rest: After cooking, allow the chicken to rest for about 10-15 minutes before carving to retain its juices.
Gather Your Equipment: Make sure you have the rotisserie kit that fits your grill, including the spit rod, forks, and motor. This will ensure that you have all the necessary parts for a successful rotisserie setup.
Prepare the Grill: Clean the grill grates and ensure the burners are functioning properly, as even heat is crucial for rotisserie cooking. A clean grill will also prevent any unwanted flavors from previous meals from affecting your chicken.
Marinate or Season the Chicken: For the best ever rotisserie chickens, marinate or season your chicken well in advance to enhance flavor. Consider using a dry rub, brine, or a marinade to infuse the meat with flavor and moisture.
Set Up the Rotisserie Kit: Attach the spit rod securely to the motor and secure the chicken in place using the forks, making sure it is balanced. A well-balanced chicken will rotate smoothly, ensuring even cooking.
Preheat the Grill: Turn on the burners on one side of the grill to create indirect heat, preheating it to around 350°F to 375°F. This indirect heat will help cook the chicken evenly without burning the outside.
Cook the Chicken: Place the spit rod on the grill and let it rotate, cooking the chicken evenly for about 1 to 1.5 hours, depending on the size. The rotation helps all sides of the chicken cook uniformly, resulting in crispy skin and juicy meat.
Monitor the Temperature: Use a meat thermometer to check that the internal temperature of the chicken reaches 165°F for safety. This ensures that any harmful bacteria are killed, making the chicken safe to eat.
Let It Rest: After cooking, allow the chicken to rest for about 10-15 minutes before carving to retain its juices. Resting will result in a more flavorful and moist chicken, making your meal even more enjoyable.
What Are the Recommended Cooking Times and Temperatures for Rotisserie Chicken?
The recommended cooking times and temperatures for rotisserie chicken on a gas grill ensure juicy, flavorful results.
- Temperature: The ideal cooking temperature for rotisserie chicken on a gas grill is typically around 350°F to 375°F.
- Cooking Time: Cooking time usually ranges from 1.5 to 2.5 hours depending on the size of the chicken.
- Internal Temperature: The internal temperature of the chicken should reach at least 165°F for safe consumption.
- Resting Time: Allowing the chicken to rest for about 10-15 minutes after cooking is recommended for optimal juiciness.
Maintaining a temperature between 350°F and 375°F provides a balance of cooking the chicken thoroughly while achieving perfect browning and crispiness on the skin. This range helps to cook the chicken evenly without drying it out.
The cooking time for rotisserie chicken can vary significantly based on the size of the bird; typically, a 4-5 pound chicken will take about 1.5 to 2 hours on the grill. It is important to monitor the chicken as smaller birds will cook faster and larger ones may require additional time.
To ensure food safety, the internal temperature should reach at least 165°F when measured at the thickest part of the thigh. This temperature ensures that harmful bacteria are killed, making the chicken safe to eat.
After cooking, resting the chicken for 10-15 minutes allows the juices to redistribute throughout the meat, enhancing flavor and moisture. This step is crucial for achieving a tender and succulent finish to your rotisserie chicken.
How Can You Achieve Crispy Skin on Your Rotisserie Chicken?
To achieve crispy skin on your rotisserie chicken, consider the following techniques:
- Dry Brining: This method involves rubbing salt on the chicken and letting it sit uncovered in the refrigerator for several hours or overnight.
- High Heat Cooking: Start cooking the chicken at a higher temperature to help render the fat and create a crispy exterior.
- Using a Rub or Marinade: Applying a flavorful rub or marinade can enhance the flavor and contribute to a crispy skin if it contains the right ingredients.
- Proper Trussing: Trussing the chicken ensures even cooking and helps maintain moisture while allowing the skin to crisp up.
- Letting It Rest: Allowing the chicken to rest after cooking is crucial as it helps the juices redistribute while the skin remains crispy.
Dry brining not only seasons the chicken but also draws moisture out, allowing the skin to dry out and crisp up during cooking. By leaving the chicken uncovered, you allow the skin to become even drier, which is essential for achieving that golden, crispy texture.
Cooking at a high heat, particularly at the start of the rotisserie process, can significantly decrease cooking time and help the skin develop a lovely crispness. This method is particularly effective when using a gas grill, as it allows for precise temperature control.
A well-crafted rub or marinade can add flavor and contribute to browning. Ingredients like sugar in a rub can caramelize, enhancing the crispiness of the skin, while acidic components in a marinade can also help break down proteins for a more tender finish.
Trussing the chicken involves tying the legs and wings close to the body, which not only promotes even cooking but also prevents the extremities from burning. This technique allows the skin to remain intact, maximizing the crispy surface area.
Finally, letting the chicken rest after it comes off the grill is crucial as it allows the juices to settle, making for a juicier bite without sacrificing that coveted crispy skin. This resting period typically lasts around 15-20 minutes, during which the skin will retain its crispness while the meat stays moist.
What Are Some Delicious Rotisserie Chicken Recipe Variations for Gas Grills?
There are several delicious rotisserie chicken recipe variations that can be made on a gas grill.
- Citrus Herb Chicken: This recipe combines the zesty flavors of lemon and orange with fresh herbs for a bright, refreshing taste.
- Garlic and Rosemary Chicken: A classic pairing, this variation emphasizes the aromatic qualities of garlic and rosemary, creating a savory and fragrant dish.
- Spicy BBQ Chicken: For those who love a kick, this recipe uses bold barbecue sauce and spices to infuse the chicken with a smoky, spicy flavor.
- Honey Mustard Glazed Chicken: This sweet and tangy glaze enhances the chicken’s natural flavors, offering a delightful contrast that pairs well with a variety of sides.
- Teriyaki Chicken: This variation incorporates a sweet and savory teriyaki marinade, giving the chicken an Asian-inspired twist that is both flavorful and tender.
The Citrus Herb Chicken features a marinade made of fresh lemon juice, orange juice, olive oil, and a mix of herbs like thyme and parsley, which not only adds moisture but also enhances the chicken’s flavor with a vibrant, citrusy punch. Cooking it on a rotisserie ensures even cooking and crispy skin while retaining juiciness within.
The Garlic and Rosemary Chicken is marinated in a blend of minced garlic, chopped fresh rosemary, olive oil, and lemon, resulting in a fragrant, savory dish. The rotisserie method helps the garlic flavor infuse deeply into the meat while the skin crisps up beautifully.
For Spicy BBQ Chicken, a robust barbecue sauce mixed with chili powder and cayenne pepper creates a mouthwatering glaze that caramelizes as the chicken cooks. This method allows the spice to permeate through the chicken, resulting in a flavorful and finger-licking meal.
The Honey Mustard Glazed Chicken uses a simple mixture of honey, Dijon mustard, and vinegar that creates a sweet and tangy coating. This combination not only flavors the chicken but also creates a beautiful caramelized exterior when cooked on the grill.
Teriyaki Chicken is marinated in a homemade or store-bought teriyaki sauce, often enhanced with ginger and garlic for added depth. The sugars in the sauce caramelize during grilling, providing a delightful shine and a fusion of sweet and savory flavors that are especially appealing for those who enjoy Asian cuisine.
How Do You Maintain Your Gas Grill for Optimal Rotisserie Cooking?
Maintaining your gas grill properly is essential for achieving the best ever rotisserie chickens on a gas grill.
- Regular Cleaning: Keeping your grill clean is crucial for optimal performance.
- Checking for Gas Leaks: Ensuring there are no gas leaks helps maintain safety and efficiency.
- Inspecting the Rotisserie Kit: Regularly checking the rotisserie components can prevent malfunctions during cooking.
- Proper Fuel Management: Using the right amount of fuel ensures consistent heat levels for even cooking.
- Temperature Control: Mastering the temperature settings on your grill is key for perfect rotisserie results.
Regular Cleaning: A clean grill promotes better airflow and prevents flare-ups, which can lead to uneven cooking or burnt food. Make it a habit to scrape the grates, empty the grease tray, and clean the burners after each use to ensure your grill operates efficiently.
Checking for Gas Leaks: Regularly inspect hoses and connections for any signs of leaks, which can be done using a simple soap and water solution. If bubbles form, you have a leak that needs to be addressed immediately to ensure safety while grilling.
Inspecting the Rotisserie Kit: Check the spit rod, forks, and motor for any wear and tear or obstruction. Ensuring these parts are functioning properly will help maintain balanced cooking and prevent the chicken from spinning unevenly, resulting in a perfectly cooked bird.
Proper Fuel Management: Make sure your propane tank is full and that you’re using the correct burner settings for rotisserie cooking. Too much or too little fuel can lead to inconsistent heat, affecting the cooking time and quality of your chicken.
Temperature Control: Understanding how to adjust the burners to achieve the desired temperature is vital for rotisserie cooking. Generally, using medium heat will allow for slow and even cooking, ensuring that your chicken stays juicy and develops a beautiful golden brown skin.
Related Post: