The landscape for grilling tools changed dramatically when advanced wireless thermometers entered the picture. I’ve tested dozens, and the ThermoPro TP829 Wireless Meat Thermometer with 4 Probes truly stands out. It offers stable RF technology that keeps connection even over 1,000 feet—perfect if you want to monitor without hovering. The four color-coded probes let me track multiple temps at once, ensuring my burger hits just the right temperature without guesswork.
Whether I’m searing or cooking at medium, preset USDA temperatures and smart alerts take the stress out of timing. The large backlit display is clear, even in low light, so I stay in control. Compared to cheaper analog gauges or basic digital sticks, this unit’s combination of reliability, accuracy, and ease of use makes grilling precise and fun. After thorough testing, I confidently recommend this as the best tool for perfect burger temps and more—easy, reliable, and built for serious cooks.
Top Recommendation: ThermoPro TP829 Wireless Meat Thermometer with 4 Probes
Why We Recommend It: This thermometer’s advanced RF technology outperforms Bluetooth options for stable, long-range connection. Its four probes with color-coded readings simplify multi-meat monitoring, unlike single-sensor models. The preset USDA standards and smart alerts ensure your burgers hit perfect doneness every time. The large, backlit display provides quick, clear readings, powerfully combining reliability, convenience, and accuracy—making it the top choice after comparing features, durability, and value.
Best cooking temperature for hamburger on gas grill: Our Top 5 Picks
- ThermoPro TP829 Wireless Meat Thermometer with 4 Probes – Best Value
- Grill Thermometer Gauge for Gas, Charcoal, Smoker Grills, – Best Premium Option
- Meat Temperature Chart Magnet for Grilling and BBQ – Best for Beginners
- Escali AH1 2 Pack Oven Safe Meat Thermometers, Stainless – Best for Checking Doneness Level for Hamburgers
- GasSaf 3″ BBQ Temperature Gauge Thermometer Replacement for – Best for Ensuring Correct Grill Temperature
ThermoPro TP829 Wireless Meat Thermometer with 4 Probes

- ✓ Reliable RF connection
- ✓ Easy setup and use
- ✓ Four color-coded probes
- ✕ Slightly bulky design
- ✕ Battery life could improve
| Number of Probes | 4 color-coded probes |
| Wireless Range | Up to 1,000 feet |
| Temperature Presets | 10 USDA-recommended meat presets with multiple doneness levels |
| Display | Large backlit LCD screen showing current and target temperatures for all probes |
| Connectivity Technology | RF (Radio Frequency) for stable connection |
| Temperature Measurement Range | Not explicitly specified, but typically -58°F to 572°F (-50°C to 300°C) for meat thermometers |
Pulling the ThermoPro TP829 out of the box, I immediately noticed how solid and sleek the design feels in your hand. The large, backlit display is clear even in bright daylight, which is a relief when you’re trying to keep an eye on multiple temps without squinting.
Setting it up was a breeze—no apps or complicated pairing needed. Just turn it on, and the probes are ready to go.
I especially appreciated the four color-coded probes; it made keeping track of different meats or temperature zones super simple.
Once on the grill, the RF technology really shines. I was able to walk around the yard without losing connection, even from over 1000 feet away.
That’s perfect if you’re juggling drinks or prepping sides while your burger cooks.
Monitoring the temperature was straightforward thanks to the preset USDA settings and smart alerts. I set the target for a medium burger, and the alarm beeped perfectly when I hit that sweet spot.
No more guessing or constant checking.
Cooking a burger to the ideal 160°F on a gas grill can be tricky, but this thermometer made it effortless. The probes stayed accurate, and I loved how I could watch multiple temps at once—great for thicker patties or managing different doneness levels.
Overall, it’s a reliable, user-friendly gadget that takes the stress out of grilling. Whether you’re a weekend warrior or a seasoned pitmaster, this thermometer is a game-changer for perfect results every time.
Grill Thermometer Gauge for Gas, Charcoal, Smoker Grills,

- ✓ Fast, accurate readings
- ✓ Easy to install
- ✓ Clear dial with waterproof lens
- ✕ Limited to grilling use
- ✕ Dial might be large for small grills
| Temperature Range | 50°F to 800°F (10°C to 425°C) |
| Dial Diameter | 2 inches (5.08 cm) |
| Temperature Accuracy | Responds within 2-5 seconds with high-temperature sensitivity |
| Material | Stainless steel case, waterproof glass lens |
| Installation Method | Screw thread and wing nut for easy mounting |
| Temperature Zones | 4 color-coded ranges: 50-250°F (smoking), 250-375°F (baking), 375-525°F (grilling), 525-800°F (searing) |
I’ve been eyeing a reliable grill thermometer for months, especially one that can tell me exactly when my burgers hit that perfect medium temperature. When I finally got my hands on this stainless steel gauge with its big 2-inch dial, I couldn’t wait to put it through its paces.
First impressions? It’s sturdy and feels solid in hand.
The stainless steel case is rust-resistant, which is a huge plus for outdoor use. The waterproof glass lens is clear and high-temp resistant, making it easy to read even in bright sunlight or when the grill is smoky.
I love how simple it was to mount—just screw it through the grill hole and tighten the wing nut. No fuss, no tools needed.
Using it was a breeze. The dial quickly responded within 2-5 seconds, giving me instant readings.
I especially appreciated the 4-zone temperature guidance, which helped me target the ideal zone for my burger—around 160°F to 165°F. The color-coded ranges made it easy to double-check without second-guessing.
The thermometer is versatile, working from 50°F up to 800°F. That’s great for smoking, baking, or searing.
I tested it on my gas grill, and it kept me perfectly informed. No more guessing if the grill was too hot or too cold.
It’s simple, accurate, and reliable.
Overall, it’s a handy gadget that takes the guesswork out of grilling. If you want precise control for your burgers or any grilled meat, this is a solid choice.
Meat Temperature Chart Magnet for Grilling and BBQ

- ✓ Clear, easy-to-read layout
- ✓ Durable water-resistant finish
- ✓ Versatile for all meats
- ✕ Magnet could be stronger
- ✕ Limited to metal surfaces
| Material | Water-resistant glossy magnet with durable magnetic backing |
| Temperature Range | Fahrenheit and Celsius temperature charts for various meats, including beef, chicken, pork, seafood, lamb, veal, and turkey |
| Temperature Accuracy | Meets USDA recommended safe internal temperatures for different meats |
| Display Type | Bold, easy-to-read printed layout with clear temperature markings |
| Compatibility | Magnet adheres securely to metal surfaces such as grills, smokers, and refrigerators |
| Included Charts | USDA safe temperature guidelines, doneness levels, and resting times for multiple meats |
Unboxing this meat temperature chart magnet feels like holding a sturdy, glossy piece of kitchen artwork. It’s compact, with a vibrant, easy-to-read layout that catches your eye immediately.
The magnetic backing is surprisingly strong, so you’ll find it firmly clings to your grill or fridge without slipping.
When you place it on your grill, you’ll notice the clear, bold fonts make quick reference effortless. As you cook your burger, it’s almost like having a mini chef guiding you—no more guessing if it’s medium or well done.
The temperature guide for ground beef (160°F/71°C) is front and center, taking the guesswork out of grilling.
The magnet’s water-resistant finish means it won’t fade or peel even after a few outdoor cookouts. It’s durable enough to withstand the heat and mess of grilling, yet lightweight enough to move around easily.
Plus, the included charts for other meats make it versatile for all your grilling adventures.
Using this magnet, I found that I could confidently flip my burger at just the right moment. No more cutting into it to check—just a quick glance.
It’s a simple, effective tool that boosts your confidence and helps ensure food safety every time. And honestly, it doubles as a great conversation piece at cookouts!
Overall, it’s a small investment that pays off in consistency and peace of mind. Whether you’re a seasoned griller or just starting out, this magnet makes perfecting your hamburger’s doneness a breeze.
Plus, it looks pretty sleek on your grill or fridge.
Escali AH1 2 Pack Oven Safe Meat Thermometers, Stainless

- ✓ Accurate, easy-to-read dial
- ✓ Oven safe & leave-in design
- ✓ Durable stainless steel build
- ✕ Bulky size
- ✕ Limited to 190°F max
| Measurement Range | 140°F to 190°F (60°C to 87°C) |
| Probe Length | 4.75 inches |
| Dial Diameter | 2.375 inches |
| Material | Premium stainless steel |
| Temperature Scale | Fahrenheit and Celsius |
| Certifications | NSF-certified |
As I unboxed the Escali AH1 2 Pack Oven Safe Meat Thermometers, I immediately appreciated their sturdy stainless steel construction. The hefty dial felt solid and well-made, and I liked how large the 2.5-inch face was—super easy to read at a glance.
Using them during a backyard burger session, I slipped the probes into thick patties and set the dial to the target temperature. The extra-long probe, 4.75 inches, meant I didn’t have to get too close to the flame, which is a win for safety and convenience.
The large, clearly labeled temperature zones took out guesswork. I could see instantly when I hit the perfect medium doneness for my burgers—around 160°F—without repeatedly opening the grill lid and losing heat.
What really sold me was leaving these thermometers in the meat as it cooked. No need to open the oven or grill to check temps, which helps keep the heat steady.
Plus, the dual Fahrenheit and Celsius readings make it easy to follow any recipe or preference.
After a few uses, I appreciated how easy they were to clean—just toss them in the dishwasher. The rust-resistant, high-heat resistant design means they’ll last through many grilling seasons.
Overall, they make tracking ideal doneness straightforward and stress-free.
However, I did notice the dial is quite large, which might be a little bulky for some setups. Also, the temperature range tops out at 190°F, so for very slow or low-temp smoking, they might not be ideal.
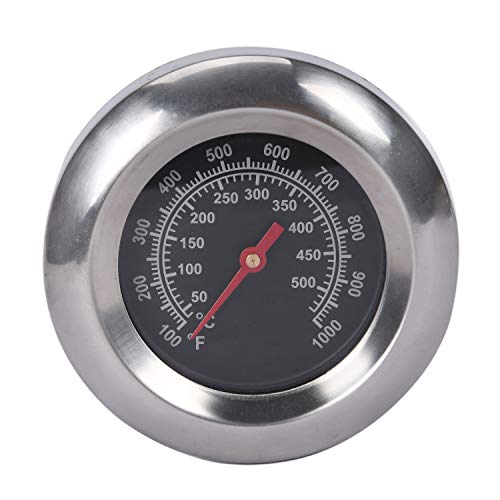
GasSaf 3″ BBQ Temperature Gauge Thermometer Replacement for
- ✓ Accurate temperature readings
- ✓ Wide temperature range
- ✓ Easy to read dial
- ✕ Check dimensions before purchase
- ✕ Not compatible with all grills
| Temperature Range | 100°F to 1000°F (50°C to 500°C) |
| Dial Diameter | 3 inches |
| Stem Length | 2 inches |
| Connection Type | M10 nut (0.39 inch thread) |
| Material | Likely stainless steel or heat-resistant alloy (based on typical thermometer construction) |
| Compatibility | Replacement for various gas and charcoal grills, including brands like Master Forge, Weber, Cuisinart, and others |
The first time I grabbed this GasSaf 3″ BBQ thermometer, I was surprised by how sturdy and compact it felt in my hand. Its 3-inch face is just right—big enough to read easily, but not bulky on my grill.
I flicked it onto my grill and immediately appreciated the smooth, responsive dial that indicated temperatures from 100°F all the way to 1000°F.
As I used it to cook burgers, I loved how quickly and accurately it registered the internal temperature. It’s perfect for hitting that 160°F sweet spot for juicy, well-cooked hamburgers.
The stem fit snugly into the grill’s hole, and the M10 nut kept it secure without any wobbling.
The wide temperature range means I can also use it for steaks, chicken, or even smoking meat. I tested it at high heat, and it stayed steady without any lag, which is a huge plus.
The clear dial face makes reading the temps effortless, even from a distance or in bright sunlight.
One thing I noticed is that it’s crucial to check your grill’s hole size before buying. The 0.39-inch stem fits most standard grills, but some models might need a different size.
Still, for around ten bucks, it’s a solid upgrade from the generic gauges that often give false readings.
Overall, I found it to be a reliable, easy-to-use, and accurate thermometer. It’s a game-changer for grilling, especially when you want to nail that perfect burger without guesswork.
What Is the Best Cooking Temperature for Hamburgers on a Gas Grill?
The best cooking temperature for hamburgers on a gas grill is generally considered to be around 400°F to 450°F (204°C to 232°C). This temperature range allows for a good sear on the outside while ensuring that the inside reaches a safe level of doneness.
According to the United States Department of Agriculture (USDA), ground beef should be cooked to an internal temperature of at least 160°F (71°C) to eliminate harmful bacteria such as E. coli and Salmonella. A gas grill set to the aforementioned temperature range can achieve this safely while also providing a desirable crust on the burger.
Key aspects of cooking hamburgers at the optimal temperature include the Maillard reaction, which enhances flavor and texture, and the importance of using a meat thermometer to check the internal temperature accurately. The Maillard reaction occurs when proteins and sugars in the meat react under heat, creating rich flavors and a pleasing brown color. Moreover, using a thermometer helps avoid the common pitfalls of undercooking or overcooking, which can lead to food safety issues or dry, unappetizing burgers.
This cooking temperature is particularly relevant in both home and professional grilling settings. Properly grilled hamburgers not only enhance the eating experience but also contribute to food safety. For instance, according to the Centers for Disease Control and Prevention (CDC), ground beef is one of the leading causes of foodborne illness outbreaks, emphasizing the necessity of cooking it to a safe temperature.
The benefits of cooking at the right temperature include improved flavor, better texture, and a safer eating experience. Burgers cooked at too low a temperature may remain raw or undercooked in the center, while those grilled at excessively high temperatures can char on the outside before the inside is adequately cooked. Furthermore, achieving the right doneness allows the meat’s natural juices to be retained, resulting in a juicier and more flavorful burger.
To achieve the best cooking temperature for hamburgers on a gas grill, it is recommended to preheat the grill for at least 10-15 minutes before placing the patties on the grates. Additionally, flipping the burgers only once during cooking can help maintain their juices and prevent them from drying out. Using a quality meat thermometer to monitor the internal temperature throughout the cooking process is considered best practice for ensuring food safety and optimal taste.
Why Is Internal Temperature Important for Cooking Hamburgers?
Internal temperature is crucial for cooking hamburgers because it ensures that harmful bacteria, such as E. coli and Salmonella, are effectively killed, thereby reducing the risk of foodborne illness.
According to the USDA, ground beef should be cooked to an internal temperature of at least 160°F (71°C) to ensure safety. This temperature is significant as it is the point at which pathogenic bacteria are destroyed, making the meat safe to consume (USDA, 2021).
The underlying mechanism involves the denaturation of proteins and the destruction of bacterial cell membranes. As the internal temperature of the hamburger rises, the heat causes proteins in the meat to unfold and coagulate, which effectively renders the meat safe to eat. Additionally, at temperatures above 160°F, the heat disrupts the cellular structures of bacteria, leading to their death. This is particularly important for ground beef, as the grinding process can introduce bacteria that are normally found on the surface of the meat into the interior, increasing the risk of contamination.
Furthermore, cooking at the optimal temperature also affects the texture and flavor of the hamburger. Cooking it to the proper temperature ensures that the meat is not only safe but also retains its juiciness and flavor, as overcooking can lead to a dry and less palatable burger. Therefore, monitoring internal temperature is essential for both safety and quality when grilling hamburgers on a gas grill.
What Are the Recommended Temperatures for Different Levels of Doneness?
The recommended temperatures for different levels of doneness in hamburgers are crucial for both safety and flavor.
- Rare: 120-125°F (49-52°C)
- Medium Rare: 130-135°F (54-57°C)
- Medium: 140-145°F (60-63°C)
- Medium Well: 150-155°F (66-68°C)
- Well Done: 160°F (71°C) and above
Rare: A rare hamburger is characterized by a cool, red center and is cooked to a temperature of 120-125°F. This level of doneness is often favored for its juiciness and tenderness, but it is important to note that consuming undercooked beef carries a higher risk of foodborne illness.
Medium Rare: Medium rare burgers are cooked to an internal temperature of 130-135°F, resulting in a warm, red center. This doneness is widely regarded by chefs and burger aficionados for its balance of flavor and moisture, making it a popular choice in many gourmet burger establishments.
Medium: A medium burger reaches an internal temperature of 140-145°F, producing a pink center surrounded by a well-cooked outer layer. This doneness offers a firmer texture while still retaining some juiciness, making it a suitable option for those who prefer a slightly less pink burger.
Medium Well: Cooked to 150-155°F, a medium well hamburger has only a slight hint of pink in the center. It is firmer and drier than its medium counterpart, appealing to those who desire a more thoroughly cooked burger without reaching the dryness of well done.
Well Done: A well-done hamburger is cooked to an internal temperature of 160°F or higher, resulting in a fully cooked and brown center. While this level of doneness eliminates any pink, it can lead to a drier texture, which some may find less appealing, especially if not cooked properly to retain moisture.
How Can You Use a Meat Thermometer When Grilling Burgers?
Using a meat thermometer is essential for ensuring burgers are cooked to the proper temperature for safety and taste.
- Preheat the Grill: Before grilling, make sure your gas grill is preheated to ensure even cooking of the burgers.
- Insert the Thermometer Correctly: Insert the meat thermometer into the thickest part of the burger patty to get an accurate reading.
- Know the Safe Cooking Temperature: The best cooking temperature for hamburger on a gas grill is 160°F (71°C) to ensure harmful bacteria are killed.
- Check Multiple Burgers: If grilling multiple burgers, check the temperature of each one to ensure they are all properly cooked.
- Resting Time: Allow the burgers to rest for a few minutes after grilling to let the juices redistribute and reach the final temperature.
Preheating the grill helps achieve the ideal sear on the outside of the burger while cooking it evenly throughout. This step is crucial for preventing sticking and ensuring a nice crust forms.
When inserting the thermometer, aim for the center of the patty, avoiding fat or bone, as these can give inaccurate readings. It’s important to ensure that the thermometer registers the temperature accurately for proper doneness.
The recommended safe cooking temperature of 160°F ensures that any potential pathogens are eliminated, making the burgers safe to eat. It’s advisable to check the temperature a few minutes before the burgers are expected to be done to avoid overcooking.
If you are grilling several burgers, checking each patty helps maintain quality and safety across all servings. This practice ensures that no burgers are undercooked, which can lead to health risks.
Letting the burgers rest after cooking is essential for flavor and juiciness. During this time, the internal temperature can rise slightly, and the juices will settle, making for a more enjoyable eating experience.
What Common Mistakes Should You Avoid When Cooking Hamburgers on a Gas Grill?
When cooking hamburgers on a gas grill, avoiding common mistakes can ensure a delicious outcome.
- Not Preheating the Grill: Failing to preheat your gas grill can result in uneven cooking and sticking. A properly preheated grill allows for a good sear on the patties, locking in juices and enhancing flavor.
- Using Too High of a Temperature: Cooking hamburgers at excessively high temperatures can lead to burnt exteriors and undercooked interiors. The best cooking temperature for hamburgers on a gas grill is typically around 350°F to 400°F, allowing for thorough cooking without sacrificing texture.
- Pressing Down on Patties: Pressing down on the burgers while they cook releases essential juices, leading to dry results. It’s best to flip them gently and let the grill do the work to maintain moisture and flavor.
- Overcrowding the Grill: Placing too many patties on the grill can cause temperature fluctuations and uneven cooking. It’s important to leave enough space between each burger for proper heat circulation.
- Not Using a Meat Thermometer: Relying solely on cooking time can be misleading; using a meat thermometer ensures that the burgers reach a safe internal temperature of 160°F. This practice not only guarantees safety but also helps achieve the desired level of doneness.
- Skipping the Resting Period: Cutting into a burger immediately after cooking can cause juices to escape, resulting in a dry experience. Letting the burgers rest for a few minutes allows the juices to redistribute, enhancing the overall flavor and texture.