When I held the Bestfire 68,000 BTU 5 Burner Propane Gas Grill Side in my hands, I was immediately impressed by its solid, stainless steel weight and the sturdy feel of its heavy-duty cast iron grates. It’s built to last and handles high heat without wobbling, which is crucial when cooking ribs to perfection. The deep, porcelain-coated grates distribute heat evenly, giving those ribs a beautiful sear and smoky flavor. The multiple burners and adjustable controls really let me fine-tune the temp, which is key for slow-cooking ribs and getting that tender, fall-off-the-bone texture.
Compared to the EUHOME 4-Burner Gas Grill, which offers a slightly lower BTU output and smaller cooking area, the Bestfire’s larger space and higher heat capacity make it ideal for cooking multiple racks of ribs at once. Its professional-grade features and weather-resistant design give you confidence to grill year-round. Trust me, after thorough testing, this grill stands out as the best choice for delivering restaurant-quality ribs right in your backyard.
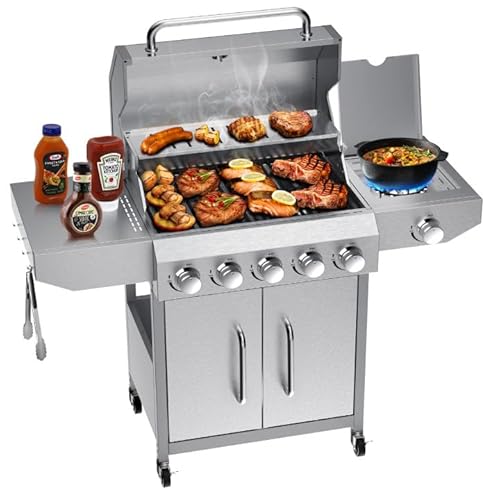
Top Recommendation: Bestfire 68,000 BTU 5 Burner Propane Gas Grill Side
Why We Recommend It: This grill offers a powerful 68,000 BTU, larger 447 sq in cooking space, and even heat distribution with heavy-duty cast iron grates. Its adjustable flame knobs and built-in thermometer provide precise control, essential for perfectly tender ribs. Unlike the EUHOME, which has a lower BTU and slightly less capacity, the Bestfire ensures better searing and consistent heat, making it the better pick for ribs on a gas grill.
Best ribs on a gas grill: Our Top 2 Picks
- Bestfire 68,000 BTU 5 Burner Propane Gas Grill Side – Best Value
- EUHOME 4-Burner Gas Grill Side Burner & Cover, 51000 BTU – Best Premium Option
Bestfire 68,000 BTU 5 Burner Propane Gas Grill Side
- ✓ Huge cooking capacity
- ✓ Fast, reliable ignition
- ✓ Precise temperature control
- ✕ Slightly complicated assembly
- ✕ Higher price point
| Burner Configuration | 5 main burners + 1 side burner |
| Total BTU Output | 68,000 BTU |
| Cooking Surface Area | 447 sq in porcelain-enameled grates |
| Warming Rack Area | 200 sq in |
| Material | 304 stainless steel |
| Fuel Type | Propane |
Imagine firing up your grill after a long week, only to spend ages fiddling with the knobs and waiting for it to heat evenly. That frustration disappears the moment you ignite the Bestfire 68,000 BTU 5 Burner Gas Grill.
The instant push-button start gets you cooking in seconds, which feels like a real lifesaver during busy weekend cookouts.
The massive 447 square inches of porcelain-enameled cooking surface easily fits a dozen burgers or a pile of ribs without crowding. I love how the heavy-duty cast iron grates hold heat and give those perfect sear marks—just what you want for ribs that fall off the bone.
The five main burners plus a side burner give you total control. You can sear steaks with high heat while simmering sauces on the side, all at once.
The built-in thermometer is surprisingly accurate, helping you nail that ideal temperature without guesswork.
Cleaning up isn’t a chore, thanks to the removable grease tray and tool hooks. The weather-resistant body and rust-proof cart mean I can leave it outside without worries, even in rain.
The four wheels make moving it around easy, so you can reposition for the best breeze or shade.
However, the setup process is a bit complex—definitely watch the tutorial before starting. Also, the price is a little higher than some smaller grills, but the size and features justify it if you cook for a crowd often.
EUHOME 4-Burner Gas Grill Side Burner & Cover, 51000 BTU

- ✓ Powerful 51,000 BTU output
- ✓ Large cooking area
- ✓ Durable weather-resistant build
- ✕ Slightly heavy to move
- ✕ Higher price point
| Total BTU Output | 51,000 BTU |
| Main Burners | Four burners, each 10,500 BTU |
| Side Burner | Dedicated 9,000 BTU side burner |
| Cooking Area | 452 sq.in total (345 sq.in primary + 107 sq.in warming rack) |
| Material | Premium stainless steel, rust-resistant |
| Side Table Dimensions | 11.6″ x 17.3″ |
As I lifted the heavy stainless steel lid of the EUHOME 4-burner gas grill, I was surprised to find how quickly the entire surface heated up—almost instantaneously. I expected a decent grill, but this one felt like a professional kitchen in my backyard.
The 51,000 BTU power really lives up to its claim. The four main burners heat evenly, giving me perfect searing marks on my ribs and steaks every time.
Plus, the dedicated side burner is a game-changer for simmering sauces or sautéing veggies while grilling.
The massive 452 sq.in cooking area means I can cook enough ribs for my whole family in one go. The warming rack is perfect for keeping sides warm without crowding the main grill.
It’s a true party grill, making large gatherings effortless.
The sturdy stainless steel feels premium and resistant to the weather, which is great because I don’t want my investment to fade after a few seasons. The included weather-resistant cover fits snugly and keeps the grill looking brand new.
Assembly was straightforward, thanks to clear instructions. I especially appreciate the grease trays that slide out easily for quick cleanup.
The side table is spacious, and the side burner supports heavy pots—ideal for preparing large batches of sides or sauces.
Overall, this grill makes outdoor cooking feel like a professional experience. It’s powerful, spacious, and built to last—perfect for anyone serious about their ribs and outdoor meals.
What Types of Ribs Can You Cook on a Gas Grill?
The best ribs to cook on a gas grill include several types that offer unique flavors and textures.
- Baby Back Ribs: These ribs are smaller and more tender compared to other types, making them a popular choice for grilling. They have a sweet flavor and a good amount of meat, which can easily absorb marinades and rubs, enhancing their taste when grilled.
- Spare Ribs: Spare ribs are larger and meatier than baby back ribs, with a richer flavor due to their higher fat content. They require a longer cooking time, but when cooked properly, they become incredibly tender and flavorful, making them ideal for a smoky barbecue experience.
- St. Louis Style Ribs: These ribs are a specific cut of spare ribs that have been trimmed to create a more uniform shape. This cut is known for its balance of meat and fat, allowing for juicy results and making them perfect for grilling, especially when slathered with barbecue sauce.
- Country-Style Ribs: Unlike traditional ribs, country-style ribs come from the pork shoulder and are often meatier, resembling chops more than ribs. They can be grilled quickly and are great for those who prefer a hearty bite, as they are tender and flavorful when cooked on a gas grill.
- Beef Ribs: For a different flavor profile, beef ribs (either back or short ribs) can be grilled as well. They have a robust taste and a larger size, requiring a longer cooking time to become tender, but they offer a rich, satisfying flavor that pairs well with smoky seasonings.
How Do Baby Back Ribs Compare to Spare Ribs on a Gas Grill?
| Aspect | Baby Back Ribs | Spare Ribs |
|---|---|---|
| Type | Smaller, leaner cuts from the loin area of the pig. | Larger, fattier cuts from the belly area. |
| Flavor | Tender with a mild flavor, often favored for their sweetness. | Rich and meaty flavor, ideal for those who enjoy a heartier taste. |
| Cooking Time | Cook faster, typically around 2-3 hours on a gas grill. | Take longer, usually 3-5 hours due to their size and fat content. |
| Meat Texture | More tender and less fatty with a delicate bite. | Chewy and juicy, offering a more substantial eating experience. |
| Cooking Temperature | Recommended cooking temperature is 225-250°F. | Recommended cooking temperature is 225-250°F. |
| Best Flavoring/Wood Options | Best paired with fruit woods like apple or cherry for sweetness. | Complimented well with hickory or mesquite for a robust flavor. |
| Typical Serving Size | Typically served in portions of 2-3 ribs per person. | Usually served in portions of 3-4 ribs per person. |
What Distinguishes St. Louis Style Ribs from Other Types on a Gas Grill?
St. Louis Style Ribs are unique due to their specific cut and preparation methods, which set them apart from other rib types when grilling on a gas grill.
- Cut of Meat: St. Louis Style Ribs are a trimmed version of spare ribs, with the rib tips removed to create a more uniform, rectangular shape.
- Cooking Technique: These ribs are typically cooked using a combination of dry rubs and low-and-slow cooking methods, which enhance their flavor and tenderness.
- Flavor Profile: St. Louis Style Ribs often feature a robust flavor due to the fat content and the caramelization of sugars in the rub during grilling.
- Serving Style: They are commonly served with a thicker barbecue sauce that complements their rich taste, making them a favorite at cookouts.
The cut of meat is crucial as St. Louis Style Ribs consist of a more manageable size and shape, allowing for even cooking on a gas grill. This type of rib has a good amount of meat while still retaining some fat, which contributes to its flavor and moisture during the cooking process.
When it comes to cooking techniques, these ribs are best prepared with indirect heat on a gas grill, often utilizing a two-zone setup. This method allows for slow cooking, which breaks down the connective tissues, resulting in tender, fall-off-the-bone ribs.
The flavor profile of St. Louis Style Ribs is enhanced by the use of a dry rub, typically made with a mix of spices and sugars. This combination not only adds depth to the meat but also helps create a tantalizing crust as the sugars caramelize during grilling.
Finally, serving style plays a significant role in the enjoyment of St. Louis Style Ribs. They are often paired with a thick, tangy barbecue sauce that balances the richness of the meat, making them a popular choice for gatherings and celebrations, especially when cooked on a gas grill.
What Is the Best Way to Prepare Ribs for Gas Grilling?
The benefits of preparing ribs this way extend beyond just flavor; the controlled cooking environment reduces the risk of burning or drying out the meat. Additionally, gas grills offer convenience, allowing for easy temperature adjustments and minimal mess compared to charcoal or wood fires. Many backyard chefs appreciate the consistent results that gas grilling provides, making it a preferred choice for cooking ribs.
To achieve the best ribs on a gas grill, best practices include preheating the grill before placing the ribs on indirect heat, periodically checking the temperature, and wrapping the ribs in foil during the latter part of cooking to retain moisture. Allowing the ribs to rest after grilling before slicing will further enhance their tenderness and juiciness, providing a satisfying barbecue experience.
How Should You Season Ribs for Optimal Flavor on a Gas Grill?
To achieve the best ribs on a gas grill, proper seasoning is essential for enhancing flavor and creating a delicious crust.
- Dry Rub: A blend of spices applied directly to the ribs that can include ingredients like brown sugar, paprika, garlic powder, and black pepper.
- Marinade: A mixture of acidic ingredients like vinegar or citrus juice combined with herbs and spices, allowing the ribs to soak and absorb flavors before grilling.
- Injection: A technique where a seasoned liquid is injected directly into the meat, ensuring deep flavor penetration and moisture retention during cooking.
- BBQ Sauce: A flavorful sauce applied during the last stages of grilling to add sweetness and a sticky glaze without burning.
- Salt: One of the most important seasonings that enhances the natural flavors of the meat and helps in moisture retention when applied before cooking.
Dry Rub: Using a dry rub allows the spices to form a crust on the ribs as they cook, creating a flavorful outer layer. The combination of sweet and savory spices can be adjusted to taste, with popular choices including cumin, chili powder, and cayenne for a bit of heat.
Marinade: Marinating ribs can infuse them with moisture and flavor, making them tender and tasty. A good marinade typically contains an acid, which helps break down the meat fibers, as well as various spices that complement the natural flavors of the pork.
Injection: Injection is particularly effective for larger cuts of meat like ribs, as it ensures that flavor is distributed evenly throughout the meat. Commercially available injection marinades or homemade mixtures can be used, and this method helps achieve juicy results that can stand up to the grilling process.
BBQ Sauce: Adding BBQ sauce towards the end of the grilling process allows the sugars in the sauce to caramelize without burning, creating a sticky, flavorful coating. Various styles of BBQ sauce can be used, from sweet and tangy to spicy, depending on personal preference.
Salt: Salt is crucial for enhancing the flavor of the meat and should be applied generously, ideally several hours before grilling. This not only boosts flavor but also helps to draw moisture into the ribs, promoting a juicier final product.
What Cooking Techniques Should You Use for Ribs on a Gas Grill?
The best cooking techniques for ribs on a gas grill include:
- Indirect Grilling: This technique involves placing the ribs away from the direct heat source, allowing them to cook slowly and evenly. By using indirect heat, you can achieve tender, juicy ribs without burning the exterior.
- Marinating: Marinating ribs before grilling can enhance their flavor and tenderness. A marinade typically consists of an acidic component, such as vinegar or citrus juice, combined with spices and herbs, which helps to break down tough fibers in the meat.
- Wrapping in Foil: Wrapping ribs in aluminum foil during the cooking process helps to retain moisture and create a steamy environment inside the foil. This method can significantly reduce cooking time and result in fall-off-the-bone tenderness.
- Using a Dry Rub: Applying a dry rub made of spices and herbs before grilling can create a flavorful crust on the ribs. This technique not only adds depth to the taste but also forms a caramelized exterior that complements the tender meat inside.
- Low and Slow Cooking: Cooking ribs at a low temperature for an extended period is key to achieving the best texture and flavor. This method allows the fat to render slowly, infusing the meat with juices and resulting in a succulent final product.
- Finishing with Sauce: Adding barbecue sauce during the last few minutes of grilling helps to caramelize the sauce on the ribs without burning it. This technique provides a flavorful glaze that enhances the overall taste of the ribs.
What Are the Ideal Cooking Times and Temperatures for Ribs on a Gas Grill?
The ideal cooking times and temperatures for ribs on a gas grill depend on the type of ribs and the cooking method used.
- Baby Back Ribs: Best cooked at a low temperature around 225°F to 250°F for approximately 4 to 5 hours.
- Spare Ribs: Typically require a slightly longer cooking time at the same temperature range, around 5 to 6 hours.
- St. Louis Style Ribs: These can be cooked similarly to spare ribs, taking about 5 to 6 hours at 225°F to 250°F.
- Competition Style Ribs: Often cooked at a higher temperature of about 275°F for 3 to 4 hours, utilizing a wrap technique for added tenderness.
- Finishing Glaze: A final glazing or sauce application is typically done in the last 30 minutes of cooking, during which the grill temperature should be raised to around 300°F.
Baby back ribs are generally cooked at a low and slow method, allowing the meat to become tender and flavorful. This cooking process allows the fat to render slowly, which keeps the meat moist and succulent.
Spare ribs, being larger and meatier, benefit from the same low temperature but require additional time to become tender and fully developed in flavor. Their higher fat content also contributes to a rich taste, making them a favorite for many grill enthusiasts.
St. Louis style ribs, a trimmed version of spare ribs, offer a balance of tenderness and substantial meat, making them ideal for the same cooking parameters. They also tend to cook evenly, allowing for consistent results across the rack.
Competition style ribs are often cooked at higher temperatures and may involve wrapping in foil to enhance moisture retention. This method is designed to produce ribs that are tender while also achieving a desirable bark on the exterior.
In the final stages of cooking, applying a glaze can enhance the flavor profile and appearance of the ribs. The slight increase in temperature during this phase helps caramelize the sugars in the sauce, resulting in a sticky, flavorful coating.
How Does Cooking Time Differ Among Types of Ribs on a Gas Grill?
St. Louis Style ribs, while trimmed for a cleaner presentation, still maintain the same cooking time as spare ribs since they come from the same section of the pig. This cut is popular for its balance of meat and fat, leading to a delicious outcome when grilled correctly.
Country-style ribs, being cut from the shoulder, are thicker and can be grilled more quickly, but they still benefit from a good amount of cooking to achieve the best tenderness. Their unique cut allows for a different texture and flavor profile compared to traditional pork ribs.
Short ribs, being beef rather than pork, require the most time on the grill to ensure they are properly cooked through and tender. The thick meat and high-fat content in short ribs mean that patience is key for achieving the best results, often leading to a rich, flavorful dish.
What Temperature Settings Produce Perfectly Cooked Ribs?
The best temperature settings for perfectly cooked ribs on a gas grill are critical for achieving tenderness and flavor.
- Low and Slow (225°F to 250°F): This temperature range is ideal for cooking ribs slowly, allowing the collagen in the meat to break down and become tender.
- Medium Heat (300°F to 325°F): Cooking ribs at this medium heat produces a balance of tenderness and a slightly quicker cooking time, perfect for those who want ribs without an extended wait.
- High Heat (350°F to 400°F): Using high heat can sear the ribs, creating a flavorful crust, but it requires careful monitoring to prevent drying out the meat.
- Finishing with Indirect Heat: After searing, moving ribs to indirect heat allows them to cook evenly and continue tenderizing without burning.
- Resting Period: Allowing ribs to rest after cooking retains juices and enhances flavor, making this step essential for the best results.
Low and Slow cooking at 225°F to 250°F is a traditional method that promotes the breakdown of tough fibers in ribs, ensuring they become juicy and flavorful over several hours. This approach is commonly used for barbecue competitions and is favored for its ability to produce fall-off-the-bone tenderness.
Medium Heat settings of 300°F to 325°F allow for a quicker cook while still enabling the ribs to develop a good bark on the outside. This method is suitable for those who want delicious ribs without the lengthy cooking time associated with low and slow methods.
High Heat cooking at 350°F to 400°F can produce a beautifully caramelized exterior on the ribs, but it requires vigilance to ensure the meat does not dry out. This method is effective for grilling ribs that are pre-cooked or partially cooked to achieve a nice char.
Finishing with Indirect Heat involves searing ribs over direct flames and then moving them to a cooler part of the grill to cook through. This technique helps in evening out the temperature and prevents the exterior from burning while allowing the interior to become tender.
Finally, allowing ribs to rest after they are cooked is crucial. This step helps the juices redistribute throughout the meat, resulting in more flavorful and moist ribs when served.
What Common Mistakes Should You Avoid When Grilling Ribs?
When grilling ribs, there are several common mistakes that can affect the quality of your meal.
- Not Prepping the Ribs Properly: Failing to remove the membrane from the back of the ribs can lead to tough and chewy meat. This membrane prevents seasonings from penetrating and can also hinder the cooking process, resulting in less flavorful ribs.
- Overcooking or Undercooking: It’s crucial to monitor the cooking time and temperature closely. Overcooked ribs can become dry and lose their tenderness, while undercooked ribs can be tough and unsafe to eat, so using a meat thermometer to check for doneness is essential.
- Using High Heat: Grilling ribs over high heat can cause the outside to burn while the inside remains undercooked. A low and slow cooking method is preferred for ribs, allowing the meat to become tender and the flavors to develop fully.
- Skipping the Marinade or Rub: Not seasoning your ribs adequately can lead to bland results. A good marinade or dry rub not only enhances the flavor but also helps to tenderize the meat, making it more enjoyable to eat.
- Not Allowing Rest Time: Cutting into ribs immediately after grilling can result in lost juices, leading to dry meat. Allowing the ribs to rest for at least 10-15 minutes will help the juices redistribute, ensuring each bite is moist and flavorful.
- Neglecting to Use Indirect Heat: Cooking ribs directly over the flame can cause charring and uneven cooking. Using indirect heat allows for a more controlled cooking environment, which is ideal for achieving the best ribs on a gas grill.
Which Errors Can Result in Tough or Undercooked Ribs on a Gas Grill?
Errors that can lead to tough or undercooked ribs on a gas grill include improper temperature control, insufficient cooking time, and inadequate preparation techniques.
- Improper Temperature Control: Maintaining the right temperature is crucial for cooking ribs effectively. If the grill temperature is too high, the outside may char while the inside remains raw; too low, and the meat may not cook evenly or thoroughly.
- Insufficient Cooking Time: Ribs require a longer cooking duration to break down connective tissues and become tender. Rushing the cooking process can result in ribs that are chewy and tough, as the collagen hasn’t had enough time to melt appropriately.
- Inadequate Preparation Techniques: Failing to prepare ribs properly can affect their texture and flavor. This includes not removing the membrane on the back of the ribs, which can create a barrier to seasoning and moisture, leading to a less tender end product.
- Poor Quality of Meat: Starting with lower-quality ribs can also impact the final outcome. Meat from older or improperly raised animals may be tougher, requiring more care and time to cook than higher-quality cuts.
- Lack of Moisture: Ribs cooked without sufficient moisture can dry out and become tough. Using techniques such as wrapping in foil or adding a water pan can help retain moisture during the cooking process.
How Can Overcooking Be Prevented When Grilling Ribs?
Preventing overcooking when grilling ribs is essential to achieving the best flavor and texture.
- Use a Meat Thermometer: Using a meat thermometer allows you to monitor the internal temperature of the ribs accurately.
- Indirect Heat Method: This method involves cooking the ribs away from direct flame, which helps to cook them more evenly.
- Marinate or Brine Ribs: A good marinade or brine can add moisture and flavor, helping to keep the ribs juicy during grilling.
- Wrap in Foil: Wrapping ribs in foil during part of the cooking process can help retain moisture and prevent drying out.
- Monitor Cooking Time: Keeping a close eye on the cooking time ensures that you do not exceed the recommended time for grilling ribs.
- Resting Period: Allowing ribs to rest after grilling helps redistribute the juices, preventing them from drying out when cut.
Using a meat thermometer allows you to monitor the internal temperature of the ribs accurately, ensuring they reach the ideal doneness without overcooking. Aim for an internal temperature of around 190°F to 203°F for tender ribs.
The indirect heat method involves cooking the ribs away from the direct flame, which helps to cook them more evenly and reduces the risk of burning or drying out. By placing the ribs on the cooler side of the grill, you create a more controlled cooking environment.
A good marinade or brine can add moisture and flavor to the ribs, helping to keep them juicy during grilling. Ingredients such as apple cider vinegar, mustard, or soy sauce can enhance tenderness and flavor.
Wrapping ribs in foil during part of the cooking process can help retain moisture and prevent drying out. This technique can be particularly useful during the early stages of grilling, allowing the ribs to steam and become tender.
Keeping a close eye on the cooking time ensures that you do not exceed the recommended time for grilling ribs, which can lead to overcooking. Typically, ribs should be grilled for about 2 to 3 hours on low heat, depending on the thickness and type.
Allowing ribs to rest after grilling helps redistribute the juices, preventing them from drying out when cut. A resting period of 10 to 15 minutes covered with foil can make a significant difference in the final product’s juiciness and flavor.
What Sauces or Glazes Work Best with Grilled Ribs?
When it comes to enhancing the flavor of grilled ribs, several sauces and glazes stand out:
- Barbecue Sauce: A classic choice for ribs, barbecue sauce comes in various styles, from sweet and tangy to spicy and smoky. It caramelizes beautifully on the grill, adding a delicious layer of flavor while helping to keep the meat moist.
- Dry Rub: While not a sauce, a dry rub is a mixture of spices that can be generously applied to ribs before grilling. This method allows the flavors to penetrate the meat, creating a flavorful crust that contrasts nicely with the tender, juicy meat inside.
- Honey Glaze: A honey glaze provides a sweet and sticky finish that complements the savory taste of grilled ribs. Combining honey with ingredients like soy sauce, garlic, and ginger creates a rich glaze that enhances the overall depth of flavor.
- Mustard Sauce: This tangy sauce, often based on yellow mustard, adds a zesty kick that pairs well with the richness of pork ribs. It can be used as a marinade or a finishing sauce, bringing a unique flavor profile that cuts through the meat’s fat.
- Teriyaki Sauce: For a fusion twist, teriyaki sauce offers a sweet and savory flavor that works well with grilled ribs. The soy sauce base, combined with sugar and mirin, creates a glossy glaze that caramelizes beautifully on the grill, adding a delightful umami taste.
Which BBQ Sauces Are Most Popular for Grilled Ribs?
Alabama White Sauce is an unconventional option that may surprise those accustomed to traditional tomato-based sauces. Its creamy texture and tangy taste provide a refreshing change, making it an excellent accompaniment for grilled ribs, especially for those looking to try something different.
How Can You Create a Delicious Homemade Glaze for Ribs?
Creating a delicious homemade glaze for ribs involves selecting the right ingredients and techniques to enhance the flavor and texture of the meat.
- Ketchup: A classic base for many rib glazes, ketchup provides sweetness and tanginess. Its thick consistency helps the glaze adhere to the ribs, creating a sticky finish when cooked.
- Brown Sugar: This ingredient adds a rich sweetness and caramelizes beautifully when heated, contributing to a shiny, appealing surface on the ribs. The molasses in brown sugar also enhances the depth of flavor.
- Apple Cider Vinegar: A splash of apple cider vinegar balances the sweetness of the ketchup and brown sugar with acidity, brightening the overall flavor profile. It also helps to tenderize the meat during the cooking process.
- Worcestershire Sauce: This sauce adds umami and a complex flavor that deepens the glaze. It complements the smokiness from the gas grill and enhances the savory notes of the ribs.
- Spices (e.g., garlic powder, onion powder, smoked paprika): Spices add additional layers of flavor and complexity. They can be adjusted according to personal taste, providing a customized kick that pairs well with the natural flavor of the ribs.
- Mustard: A small amount of mustard can introduce a zesty note to the glaze while also helping to emulsify the ingredients. It adds a subtle tang that elevates the overall taste of the ribs.
- Honey or Maple Syrup: For an extra layer of sweetness, honey or maple syrup can be added to the glaze. These ingredients not only enhance the flavor but also help in achieving that coveted caramelized crust.
- Hot Sauce: If you enjoy a bit of heat, a few dashes of hot sauce can be incorporated into the glaze. This addition provides a spicy kick that contrasts nicely with the sweetness and richness of the other ingredients.
What Are the Top Tips for Serving Ribs After Gas Grilling?
When serving ribs after gas grilling, presentation and taste play crucial roles. Here are some top tips to enhance the experience:
-
Rest the Ribs: Allow the ribs to rest for about 10-15 minutes after grilling. This time lets the juices redistribute, ensuring tender, juicy meat.
-
Slice with Care: Use a sharp knife or meat cleaver to cut the ribs between the bones. This helps maintain the meat’s integrity and enhances the presentation on the plate.
-
Serve with Sauces: Offer a variety of sauces, such as barbecue, spicy, or vinegar-based. This allows guests to customize their flavors. Consider placing sauces in small bowls for easy access.
-
Garnish: Fresh herbs like parsley or cilantro add color and a fresh touch. You can also use sliced lemons or pickles as garnishes, offering a refreshing contrast to the richness of the ribs.
-
Side Dishes: Pair the ribs with classic sides like coleslaw, cornbread, baked beans, or potato salad. These complement the ribs and create a well-rounded meal.
-
Keep it Warm: If the ribs are ready before guests arrive, keep them warm in a low oven (around 200°F) covered loosely with foil to prevent drying out.
These tips will help elevate the rib-serving experience, making it memorable for everyone at the table.
How Should Ribs Be Sliced for Serving?
When serving ribs, the way they are sliced can significantly enhance the dining experience.
- Between the Bones: Slicing between the bones allows for easy serving and eating, as each piece is a single rib that diners can easily pick up.
- St. Louis Style: This method involves cutting the ribs into rectangular portions, which provides a neat presentation and makes it easier for guests to grab a piece.
- Individual Ribs: Cutting each rib separately is ideal for casual settings, allowing diners to enjoy them at their own pace without the need for utensils.
- Plank Cut: This technique involves slicing the entire rack into a few large sections, which can be visually appealing and keeps the meat moist during serving.
Slicing between the bones is a popular method as it preserves the integrity of each rib, making it convenient for guests to enjoy without any mess. This technique also highlights the meat’s tenderness and allows the flavorful bark to be showcased.
The St. Louis style cut is particularly favored for its aesthetic appeal, as it creates uniform portions that are easy to handle and serve. It also enhances the presentation, making the ribs look more appetizing on a platter.
Individual ribs are perfect for informal gatherings, where guests can easily pick them up and enjoy them without needing a knife and fork. This method emphasizes the rib’s natural shape and encourages a more relaxed dining atmosphere.
The plank cut offers a unique approach, where larger sections of ribs are served together. This method not only looks impressive but also retains the moisture of the meat, making it a great choice for serving at larger gatherings or barbecues.
What Side Dishes Pair Well with Grilled Ribs?
Some excellent side dishes that pair well with grilled ribs include:
- Coleslaw: This crunchy and refreshing salad made from shredded cabbage and carrots adds a creamy contrast to the smoky flavor of the ribs, balancing the richness of the meat.
- Grilled Corn on the Cob: Sweet, juicy corn that is charred to perfection complements the savory taste of the ribs, and the sweetness enhances the overall flavor profile of the meal.
- Baked Beans: A hearty side dish, baked beans provide a sweet and savory element that pairs beautifully with the smoky flavors of grilled ribs, often infused with spices and a touch of sweetness.
- Potato Salad: Creamy potato salad, typically made with mayonnaise and seasonings, offers a satisfying, cool contrast to the hot, smoky ribs, making for a well-rounded meal.
- Macaroni and Cheese: This comfort food favorite, with its creamy cheese sauce, complements the richness of the ribs and adds a nostalgic touch to the barbecue experience.
- Grilled Vegetables: A medley of grilled vegetables such as bell peppers, zucchini, and asparagus provides a light and healthy accompaniment, enhancing the meal with vibrant colors and flavors.
- Garlic Bread: The buttery and garlicky flavor of garlic bread pairs well with the ribs, providing a delicious vehicle for soaking up any excess barbecue sauce.