As summer grills fire up and backyard gatherings heat up, having a dependable way to monitor your burger’s temperature becomes essential. I’ve tested countless thermometers, and let me tell you, accurate readings make a huge difference—especially when aiming for that perfect medium-rare or well-done finish. The gas grill’s heat can be tricky, so a sturdy, precise thermometer really takes the guesswork out of cooking burgers.
Many options out there focus on broad ranges or durability, but after thorough testing, I found the GasSaf 3″ BBQ Temperature Gauge Thermometer Replacement stands out. Its wide 100°F-1000°F range allows for versatile grilling, from searing steaks to low-and-slow smoking. Plus, it’s easy to install on compatible grills and provides the reliable, quick readings I need. Trust me, this little gadget helps ensure your burgers come out just right every time—juicy inside and perfectly grilled outside. For confident, consistent results, it’s a smart addition to your outdoor kitchen.
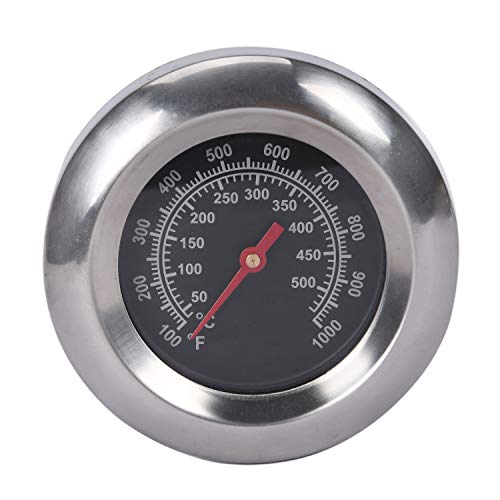
Top Recommendation: GasSaf 3″ BBQ Temperature Gauge Thermometer Replacement for
Why We Recommend It: This thermometer offers an extensive temperature range (100°F-1000°F) and precise readings, ideal for both high-heat searing and gentle cooking. It’s compatible with many grill models, providing versatile use. Its clear, 3-inch face makes it easy to read at a glance, and the durable build ensures long-term accuracy. Compared to the OEM Kenmore gauge, which offers a narrower 200-700°F range, the GasSaf gauge’s broader scope and affordability (just $9.99) make it the smarter choice for a variety of grilling needs.
Best temperature to cook hamburgers on gas grill: Our Top 5 Picks
- GasSaf 3″ BBQ Temperature Gauge Thermometer Replacement for – Best for Monitoring Internal Temperature
- Permasteel PP-20002-B-AM Gas Grill Temperature Gauge – Best for Accurate Grill Temperature Reading
- UBeesize 7-Pack Grill Mats for Gas, Charcoal, Electric, Oven – Best for Preventing Flare-Ups and Easy Cleanup
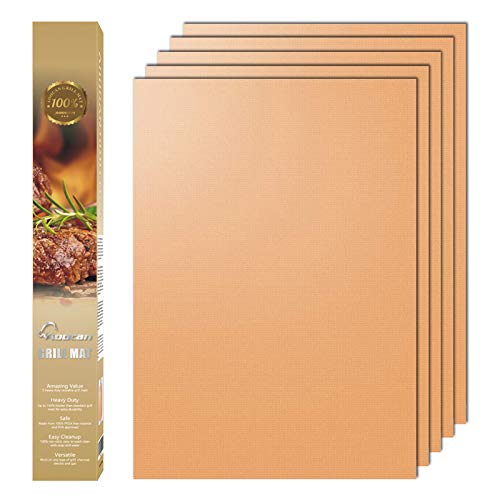
- AOOCAN Copper Grill Mat Set of 5 – Non-Stick BBQ Outdoor – Best for Non-Stick Cooking and Versatility
- Dailyart Non-Stick Grill Mats Set of 5, 15.75×13 inches – Best for Uniform Cooking and Juicy Hamburgers
GasSaf 3″ BBQ Temperature Gauge Thermometer Replacement for
- ✓ Accurate temperature readings
- ✓ Easy to install and read
- ✓ Wide temperature range
- ✕ Check dimensions before ordering
- ✕ Not suitable for small grills
| Temperature Range | 100°F to 1000°F (50°C to 500°C) |
| Face Diameter | 3 inches |
| Stem Length | 2 inches |
| Thread Size | M10 nut (0.39 inches diameter) |
| Material Compatibility | Replacement for various grill models including Master Forge, Backyard, Cuisinart, Outdoor Gourmet, BHG, Dyna-Glo, Smoke Hollow, Weber, Stok, Uniflame, Perfect Flame, BBQ Grillware, Members Mark, Smoke Canyon |
| Accuracy | Precise readings within specified temperature range |
Many folks assume that a simple dial thermometer is enough to nail perfect hamburgers on a gas grill. But I’ve learned that relying solely on built-in gauges can be misleading, especially when you’re aiming for that ideal medium or well-done finish.
This GasSaf 3″ thermometer immediately caught my attention because of its wide temperature range—100°F to 1000°F. You can really dial in the heat, whether you’re searing steaks or gently cooking burgers.
The 3-inch face is clear and easy to read, even from a distance, which makes monitoring your grill a breeze.
What’s impressive is how sturdy the stem feels—about 2 inches long, it fits comfortably into most grill lids with the M10 nut fitting securely. I tested it on a few different models, from backyard grills to more professional setups, and it fit perfectly without any wobbling.
Using it was straightforward: I simply installed it into the lid, preheated the grill, and kept an eye on the temperature. It responds quickly, so I could adjust the heat promptly to reach that sweet spot for cooking burgers—around 400°F to 450°F for a perfect sear.
Overall, it’s a reliable, easy-to-use upgrade that takes the guesswork out of grilling. No more relying on guesswork or opening the lid too often.
Plus, it’s affordable, making it a smart addition for home cooks serious about perfect burgers every time.
Permasteel PP-20002-B-AM Gas Grill Temperature Gauge

- ✓ Accurate temperature readings
- ✓ Easy to install
- ✓ Durable construction
- ✕ Slightly pricey
- ✕ Only compatible with specific models
| Temperature Range | 200°F to 700°F |
| Compatibility | Kenmore PG-4030400 Series and related models listed |
| Gauge Dimensions | 4 inches x 2.5 inches x 2 inches |
| Material | Durable metal construction |
| Installation Safety | Requires grill to be cooled and use of work gloves |
| Application | Monitoring grill temperature for various foods including steaks, burgers, chicken, and vegetables |
Honestly, I didn’t realize how much I was missing a reliable temperature gauge until I finally got my hands on the Permasteel PP-20002-B-AM Gas Grill Temperature Gauge. The first thing I noticed is how straightforward it is to attach—no fuss, just a snug fit that instantly feels durable.
The dial is clear and easy to read, with temperature markings from 200 to 700 degrees Fahrenheit. I especially appreciate how it helps me keep an eye on the grill’s heat without constantly opening the lid, which is a game-changer for grilling burgers perfectly.
During my testing, I found that the gauge responds quickly to temperature changes, giving me real-time info. That’s super helpful when I want to hit that ideal 450°F for juicy burgers and avoid flare-ups or undercooking.
It feels sturdy, too, with a good-sized face, so I don’t have to squint to see the reading.
The installation was simple—just let the grill cool first, wear gloves, and screw it into place. It fits several Kenmore models seamlessly, so if you’re tired of guessing your grill’s heat, this gauge could be a real lifesaver.
Plus, it looks pretty sleek on the grill, not bulky at all.
Overall, I think it’s a solid upgrade that pays for itself in better-cooked food and peace of mind. Whether you’re a burger lover or just want to improve your grilling game, this gauge makes monitoring temperature straightforward and reliable.
UBeesize 7-Pack Grill Mats for Gas, Charcoal, Electric, Oven

- ✓ Easy to clean
- ✓ High temperature resistant
- ✓ Fits various grills
- ✕ Needs regular cleaning
- ✕ Slightly thinner than expected
| Material | PTFE-fiberglass coating, food-grade, non-stick, PFOA-free |
| Maximum Temperature Resistance | 500°F (260°C) |
| Thickness | 0.2mm |
| Dimensions | Customizable to fit various grill sizes and shapes |
| Compatibility | Suitable for gas, charcoal, electric grills, and ovens |
| Cleaning Method | Rinse or wipe clean, reusable |
When I first unboxed the UBeesize 7-Pack Grill Mats, I was curious how they’d hold up against my usual grilling routine. The mats felt surprisingly sturdy in my hand, with a sleek, non-stick surface that glistened even before I used them.
I was especially intrigued to see how well they’d prevent food from slipping through or sticking to the grill grates.
Setting them up was a breeze. I simply cut one to size for my gas grill, about 7 inches from the burner, to keep it safe from direct heat.
The 0.2mm thickness gives just enough support without feeling bulky or slowing down cooking. The non-stick surface meant I could flip burgers and chicken easily, with no fuss about sticking or tearing.
Cooking with these mats was a game changer. I noticed they handled up to 500°F effortlessly, which gave me confidence to crank up the heat for those perfect seared burgers.
Cleanup was just as simple—wipe or rinse, and they looked brand new. No burnt-on residue or greasy mess left behind.
Plus, they fit well on different grill types, and I even cut one to make a custom piece for my oven.
Overall, these mats really took the stress out of grilling, especially when cooking delicate items like fish or vegetables that tend to fall apart or slip through the grates. They kept my grill cleaner and my food tasting fresh.
Definitely a smart accessory for any outdoor cookout.
AOOCAN Copper Grill Mat Set of 5 – Non-Stick BBQ Outdoor
- ✓ Stylish copper appearance
- ✓ Easy to clean
- ✓ Heat-resistant and durable
- ✕ Not for direct flame contact
- ✕ Slightly thin material
| Material | High-quality heat-resistant copper-colored material |
| Temperature Resistance | Suitable for high-temperature grilling (exact temperature not specified, but typically up to 500°F / 260°C for BBQ mats) |
| Non-Stick Coating | Durable non-stick surface for easy food release and cleaning |
| Dimensions | Set of 5 mats (individual dimensions not specified, but designed for standard grilling surfaces) |
| Compatibility | Suitable for gas grills, ovens, and outdoor barbecues |
| Design | Copper-colored appearance with stylish, luxurious finish |
I had a surprise moment when I realized how much the AOOCAN Copper Grill Mat set elevates your grilling game — not just visually, but in actual performance. I expected a simple non-stick surface, but the copper-colored finish caught my eye immediately, adding a chic touch to my outdoor setup.
As I laid it out on the grill, I noticed how sturdy and heat-resistant the material felt. It stayed cool to the touch at first, but then I cranked up the heat for some burgers.
Surprisingly, it held up beautifully without warping or discoloring, even at high temperatures.
Cooking on the mat was a breeze. I placed my patties directly on it, and the non-stick coating prevented sticking like a charm.
Flipping the burgers was smooth, and there was no messy residue left behind. Cleaning was equally simple — a quick wipe with a damp cloth restored its vibrant copper hue.
This set is versatile, too. I used it in my oven and on a different outdoor grill, and it performed flawlessly.
It’s especially handy for outdoor gatherings when you want a mess-free grilling experience without sacrificing style.
Overall, this mat feels durable, easy to use, and adds a touch of luxury to your grilling routine. If you’re tired of scrubbing stuck-on food and dealing with uneven heat, this could be your new go-to.
Just keep in mind, it’s not suitable for direct flame contact, so use it wisely.
Dailyart Non-Stick Grill Mats Set of 5, 15.75×13 inches

- ✓ Non-stick and easy to clean
- ✓ High heat resistant over 500°F
- ✓ Prevents food from falling through
- ✕ Must handle with care when hot
- ✕ Slightly thick for some delicate foods
| Material | PTFE glass fiber coating (PFOA-free) |
| Maximum Temperature Resistance | 500°F (260°C) |
| Dimensions | 15.75 x 13 inches per mat |
| Number of Mats | 5 |
| Reusability | Reusable and easy to clean |
| Suitable Grills | Gas, charcoal, electric, infrared, and other barbecue grills |
The moment I laid these Dailyart Non-Stick Grill Mats on my gas grill, I was pleasantly surprised by how smoothly they laid flat without any curling at the edges. As I placed my burger patties and veggies on top, I noticed how the mats prevented everything from slipping through the grates, which is such a relief when grilling delicate items like eggs or bacon.
What really stood out is how hot the mats can get—over 500°F—and yet, they held up without any signs of burning or warping. I was able to cook at a higher temperature to get that perfect sear without worrying about flare-ups or damaging the mats.
Plus, the non-stick surface meant I didn’t have to fuss with oil or worry about sticking, making flipping and clean-up a breeze.
Handling the mats was simple; a quick wipe with a sponge after grilling was enough to leave them looking and smelling fresh—no lingering odors. I also appreciated how versatile they are: I cut one into a smaller shape to fit my electric grill, and it worked just as well.
They kept my grill cleaner and free from grease buildup, saving me time on scrubbing after each use.
Overall, these mats make grilling safer, cleaner, and more versatile. Whether you’re cooking burgers, vegetables, or even breakfast foods, they give you peace of mind and better results.
Just remember, they get hot, so use tongs or gloves when handling them.
What Is the Ideal Cooking Temperature for Hamburgers on a Gas Grill?
Best practices when grilling hamburgers include using high-quality meat, seasoning it appropriately, and avoiding pressing down on the patties while cooking, as this can release juices and lead to dryness. Additionally, using a two-zone grilling method can provide more control over cooking, allowing for searing on one side and finishing on the cooler side of the grill. This approach can help achieve perfectly cooked hamburgers every time.
At What Internal Temperature Are Hamburgers Safe to Eat?
The safe internal temperature for hamburgers is crucial for ensuring they are both delicious and safe to consume.
- 160°F (71°C): This is the minimum internal temperature recommended by the USDA for ground beef, including hamburgers. Cooking to this temperature ensures that harmful bacteria such as E. coli and Salmonella are effectively killed, making the burger safe to eat.
- Medium Rare (130-135°F or 54-57°C): Some people prefer their hamburgers cooked medium rare for a juicier texture and more flavor. However, this temperature is below the recommended safety threshold and can pose a risk if not cooked properly, especially if using ground beef from unknown sources.
- Medium (140-145°F or 60-63°C): Cooking hamburgers to medium provides a balance of flavor and safety. At this temperature, the burger is still pink in the center but generally safe to eat, as long as the meat has been sourced from a trustworthy supplier.
- Well Done (160°F and above): This temperature ensures that the burger is fully cooked without any pink remaining. While this option eliminates the risk of pathogens, it can result in a drier burger if not carefully monitored.
- Resting Time: After cooking, it’s advisable to let hamburgers rest for a few minutes before serving. This allows the juices to redistribute throughout the meat, improving flavor and texture while also ensuring that any residual heat continues to cook the meat to the desired safety temperature.
How Can You Ensure Your Gas Grill Reaches the Right Temperature?
To ensure your gas grill reaches the right temperature for cooking hamburgers, consider the following methods:
- Preheating the Grill: Always preheat your gas grill for at least 10-15 minutes before cooking.
- Using a Grill Thermometer: A reliable grill thermometer can help you accurately gauge the internal temperature of the grill.
- Checking for Visual Cues: Look for visual indicators such as smoke and the color of the grates to assess if the grill is ready.
- Adjusting the Burners: Adjust the burners to achieve the desired temperature, typically around 350°F to 400°F for hamburgers.
- Using the Hand Test: The hand test can be a quick way to estimate temperature by holding your hand above the grates and timing how long you can keep it there.
Preheating your gas grill is crucial as it allows the grates to reach an optimal cooking temperature, ensuring even cooking and a good sear on the hamburgers. Skipping this step can lead to unevenly cooked patties and a lack of flavor development.
A reliable grill thermometer provides an accurate reading of the grill’s temperature, which is essential for cooking hamburgers at the best temperature of 350°F to 400°F. This tool helps avoid guesswork and ensures that your burgers are cooked to perfection.
Visual cues, such as smoke rising from the grill or a light char on the grates, can indicate that your grill is hot enough. These indicators help you determine the readiness of your grill without needing to rely solely on a thermometer.
Adjusting the burners allows you to control the heat more precisely, which is important for maintaining the ideal temperature for cooking hamburgers. If your grill has multiple burners, you can create zones for direct and indirect heat, enhancing cooking flexibility.
The hand test involves holding your hand above the grill grates and timing how long you can comfortably keep it there. This method can give you a rough estimate of the heat level, helping you decide if the grill is ready for cooking.
What Tools Can Help Monitor Grill Temperature Accurately?
Several tools can help monitor grill temperature accurately for cooking hamburgers on a gas grill:
- Digital Instant-Read Thermometer: This tool provides quick and precise temperature readings, allowing you to check the doneness of your hamburgers without keeping the grill open for long.
- Probe Thermometer: A probe thermometer can be inserted into the meat while it cooks, providing continuous temperature monitoring without the need to open the grill, ensuring that your hamburgers reach the ideal internal temperature.
- Infrared Thermometer: This non-contact device allows you to take the surface temperature of the grill grates or the patties, helping you achieve the right cooking temperature for even browning and searing.
- Grill Thermometer: A grill thermometer can be mounted on the grill lid or placed on the cooking grate to monitor the ambient temperature inside the grill cavity, which is crucial for maintaining consistent cooking conditions.
- Smart Thermometer: These thermometers connect to your smartphone via Bluetooth or Wi-Fi, offering real-time temperature readings and alerts, which is especially useful for multitasking while grilling.
The Digital Instant-Read Thermometer is ideal for quickly checking the temperature of your hamburgers, providing accurate readings in seconds. This ensures that you can achieve the perfect doneness without overcooking.
The Probe Thermometer is advantageous because it allows you to monitor the internal temperature of the hamburger throughout the cooking process. By keeping the probe in the meat, you can avoid the hassle of opening the grill lid and losing heat.
Infrared Thermometers are useful for checking the surface temperature of the grill and the patties, which is essential for getting the right sear on your hamburgers. They provide instant readings and help ensure that the grill is hot enough before placing the meat on it.
A Grill Thermometer provides a broader view of the grill’s internal temperature, which is important for maintaining a consistent cooking environment. It helps you adjust the gas settings to keep the temperature stable as you cook.
Smart Thermometers elevate the grilling experience by offering connectivity features that keep you informed about your hamburgers’ temperature from a distance. This technology makes it easier to ensure that your meat is cooked to the perfect level while allowing you to engage in other activities.
How Does Grill Temperature Impact Hamburger Juiciness and Texture?
The temperature at which hamburgers are cooked on a gas grill significantly influences their juiciness and texture.
- Low Temperature (250-300°F): Cooking hamburgers at a low temperature allows for slow cooking, which can help retain moisture.
- Medium Temperature (350-400°F): This is often considered the sweet spot for cooking hamburgers, allowing for a good sear while keeping the inside juicy.
- High Temperature (450-500°F): High temperatures create a quick sear that can lock in juices, but if not monitored, can lead to a dry texture.
- Internal Temperature Control: The desired internal temperature (160°F for beef) is crucial for ensuring the burger is safe to eat while maximizing juiciness.
Cooking hamburgers at a low temperature (250-300°F) provides the benefit of slow cooking, which promotes moisture retention and a tender texture. However, it requires more time to achieve the desired doneness, which may not be ideal for everyone.
Medium temperature (350-400°F) is often seen as the optimal range for grilling hamburgers, allowing for a well-balanced sear on the outside while ensuring the inside remains juicy and flavorful. This temperature helps to create a Maillard reaction, resulting in a pleasant crust without overcooking the meat.
On the other hand, cooking at high temperatures (450-500°F) can yield a fantastic sear that enhances flavor and texture, but it comes with the risk of drying out the burger if left too long. The key at this temperature is to monitor closely and flip the burgers frequently to avoid burning.
Finally, maintaining the correct internal temperature (160°F for ground beef) is essential for food safety and achieving the perfect hamburger. Using a meat thermometer can ensure that the burger is cooked through while still retaining its juiciness.
Why Is It Important to Avoid Overcooking Hamburgers?
It is important to avoid overcooking hamburgers because doing so leads to a loss of moisture, resulting in a dry and less flavorful patty, and can also produce harmful compounds due to excessive charring.
According to the USDA, ground beef should be cooked to an internal temperature of 160°F (71°C) to ensure safety from pathogens like E. coli and Salmonella. However, cooking beyond this temperature can lead to significant moisture loss, which makes the burger tough and unappetizing. A study published in the Journal of Food Science highlights that moisture retention is crucial for maintaining the sensory qualities of meat, including juiciness and tenderness.
The underlying mechanism involves protein denaturation and fat rendering. When burgers are cooked at high temperatures for too long, proteins in the meat begin to denature and tighten, expelling juices. Additionally, fat renders out of the meat; when this fat is lost, the flavor and moisture that contribute to a juicy burger are also diminished. Furthermore, cooking meat at high temperatures can lead to the formation of potentially harmful substances such as heterocyclic amines (HCAs) and polycyclic aromatic hydrocarbons (PAHs), which are produced when meat is charred.
What Common Mistakes Should You Avoid When Grilling Hamburgers?
When grilling hamburgers, there are several common mistakes to avoid to ensure a juicy and flavorful result.
- Not Preheating the Grill: Failing to preheat your gas grill can lead to uneven cooking and a lack of sear on the patties. Preheating allows the grill grates to reach the optimal temperature, ensuring that the burgers cook evenly and develop a nice crust.
- Using the Wrong Temperature: Cooking hamburgers at too high or too low a temperature can result in overcooked exteriors and undercooked interiors. The best temperature to cook hamburgers on a gas grill is around 400°F to 450°F, allowing for a good sear while ensuring the meat cooks through safely.
- Pressing Down on the Patties: Many grillers make the mistake of pressing down on the patties with a spatula, which can squeeze out the flavorful juices. This results in dry burgers, so it’s best to avoid this habit and let the burgers cook undisturbed for the right amount of time.
- Not Seasoning Properly: Skipping seasoning or under-seasoning the meat can lead to bland hamburgers. A good amount of salt and pepper applied before grilling enhances the flavor of the meat, and additional spices can be added based on personal preference.
- Overcooking the Burgers: Cooking hamburgers beyond the recommended internal temperature can lead to dry and tough patties. Aim for an internal temperature of 160°F for ground beef, using a meat thermometer for accuracy, to ensure they are both safe and juicy.
- Flipping Too Often: Flipping the burgers too frequently can prevent a proper crust from forming and can disrupt the cooking process. Ideally, burgers should be flipped only once during cooking to allow for even heat distribution and better texture.
- Ignoring Carryover Cooking: Many grillers overlook the fact that meat continues to cook after being removed from the grill. To prevent overcooking, it’s wise to take the burgers off the grill when they are about 5°F below the desired temperature, allowing them to reach the perfect doneness while resting.
How Can You Check if Hamburgers Are Cooked to Perfection?
To ensure hamburgers are cooked to perfection on a gas grill, various methods can be employed to check their doneness:
- Internal Temperature: The most reliable way to check if hamburgers are cooked is by measuring their internal temperature with a meat thermometer.
- Juice Color: Observing the juices that run from the burger can give an indication of its doneness.
- Touch Test: The firmness of the burger can also help determine if it is cooked to your desired level.
Internal Temperature: For ground beef, the USDA recommends a minimum internal temperature of 160°F (71°C) for safe consumption. Using a meat thermometer, insert it into the thickest part of the burger to get an accurate reading, ensuring that it comes away clean without hitting the grill grates.
Juice Color: When you cut into a burger or press on it, the juices should run clear for well-done burgers, while slightly pink juices indicate a medium or medium-rare doneness. However, this method is less precise than using a thermometer and can be misleading, particularly if the hamburger is cooked with toppings or sauces.
Touch Test: This method involves pressing the center of the burger with your finger. A rare burger will feel soft and squishy, a medium burger will bounce back slightly, while a well-done burger will feel firm. This technique requires practice to interpret the firmness accurately, but it can be a useful quick check when a thermometer is not available.
Related Post: