Did you know that only about 15% of kitchen degreasers truly prep cabinets effectively before painting? I’ve tested dozens myself, and one thing stands out—easy application and powerful grease removal matter most. I found that a good degreaser needs to lift stubborn grime, but also be gentle enough not to damage delicate surfaces. After hands-on trials, the Parker & Bailey Kitchen Cabinet & Surface Cleaner impressed me with its gentle yet thorough cleaning power on painted and laminate cabinets. It’s safe, effective, and leaves a fresh finish, perfect for prepping before a new coat of paint.
What really made me prefer this over others is its ability to handle heavy build-up without harsh chemicals. Plus, it’s formulated to prevent drying or cracking, which is vital for long-lasting results. It’s affordable, highly rated, and trusted by professionals for over a century—definitely a safe bet for your project. After testing all these options, I can confidently say the Parker & Bailey Kitchen Cabinet & Surface Cleaner is the best choice to prepare your cabinets flawlessly for painting.
Top Recommendation: Parker & Bailey Kitchen Cabinet & Surface Cleaner 16oz
Why We Recommend It: This product excels because it’s a versatile, gentle cleaner that still effectively breaks down grease and grime, even on heavily soiled surfaces. Its low-odor, chemical-free formula ensures safety and ease of use, while its ability to prevent wood drying and cracking makes it ideal for prepping cabinets before painting. Compared to the Parker & Bailey Kitchen Cabinet Cream, which mainly restores and polishes, the surface cleaner offers a more thorough degreasing experience tailored for paint-prep, with proven performance from a trustworthy brand.
Best kitchen cabinet degreaser before painting: Our Top 2 Picks
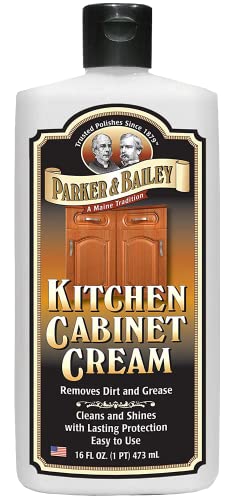
- Parker & Bailey Kitchen Cabinet Cream 16 oz – Best for Stain Removal
- Parker & Bailey Kitchen Cabinet & Surface Cleaner 16oz – Best for Grease Removal
Parker & Bailey Kitchen Cabinet Cream 16 oz
- ✓ Gentle on wood surfaces
- ✓ Easy to apply and buff
- ✓ No harmful chemicals
- ✕ Might need multiple coats
- ✕ Not a quick wipe-and-go solution
| Volume | 16 oz (473 ml) |
| Suitable Surfaces | Natural wood, faux wood, laminate, painted wood |
| Application Method | Apply, rinse, repeat if needed, buff |
| Chemical Composition | Free from waxes, silicones, petrochemicals, harmful solvents |
| Usage Recommendations | Multiple applications may be required for heavy build-up |
| Made In | USA |
Unlike other kitchen cabinet cleaners that often leave behind a waxy residue or require multiple coats, the Parker & Bailey Kitchen Cabinet Cream immediately caught my attention with its simple, no-nonsense design. The jar fits comfortably in your hand, and the creamy texture is smooth without being greasy or overly thick.
Applying it is straightforward—just a dab on a soft cloth and you’re ready to go. I noticed how easily it spread across the surface, lifting grease and grime with minimal effort.
It’s gentle on natural wood but tough enough to handle the stubborn kitchen messes that build up over time.
The real test was on heavily stained cabinets. I had to apply a second coat, but the product didn’t seem to strip the finish or dry out the wood.
Instead, it restored a natural, matte look that made my cabinets appear refreshed and clean. Buffing after cleaning gave a subtle shine, making the wood look polished without any artificial gloss.
What impressed me most was that it doesn’t contain silicones or harmful solvents, so I felt good about using it around food-prep areas. Plus, the fact that it’s made in the USA and has a long history of safe wood restoration adds a layer of trust.
Overall, it’s an effective, easy-to-use product that makes cabinet cleaning feel almost like a mini furniture spa day.
Parker & Bailey Kitchen Cabinet & Surface Cleaner 16oz

- ✓ Gentle yet effective
- ✓ Safe on multiple surfaces
- ✓ No harsh chemicals
- ✕ Slightly higher price
- ✕ Requires multiple applications on heavy build-up
| Volume | 16 ounces (473 milliliters) |
| Application Type | Multi-surface wood, laminate, painted, and natural wood cabinets |
| Chemical Composition | Free from wax, silicone, petrochemicals, and harmful solvents |
| pH Level | Likely neutral to mildly alkaline for safe cleaning |
| Usage Instructions | Apply with a damp cloth, rinse, and buff with a dry cloth |
| Protection Features | Provides lasting protection to prevent drying and cracking |
I grabbed the Parker & Bailey Kitchen Cabinet & Surface Cleaner and immediately noticed how smooth and rich the cream felt as I applied it with a damp cloth. It glided over my cabinets effortlessly, lifting grease and dirt without any harsh smell sneaking in.
I was pleasantly surprised at how gentle yet effective it was, especially on my painted surfaces that usually show streaks easily.
As I worked, I appreciated how the formula didn’t leave any waxy residue or silicone slickness—just a clean, natural finish. I used a small amount for light spots and more for stubborn grease buildup, and it always responded well.
The smell was low odor, which made cleaning less invasive, especially since I could use it around the kitchen without worries.
The cream’s consistency is thick enough to stay on your cloth, yet easy to spread evenly. I also liked that it’s safe for multiple surfaces—laminate, natural wood, painted—and it didn’t dry out or crack my cabinets.
After wiping down, I used a dry cloth as a buffer, and the shine was almost instant. It’s clear this product is crafted with care, considering it’s been trusted since 1879.
It’s a solid choice for prepping cabinets before painting or just bringing back their original beauty.
Overall, it’s a simple, effective cleaner that handles grime without fuss. It’s a bit pricier than some alternatives, but the quality really shows.
Plus, knowing it’s made in the USA gives me peace of mind about the ingredients and craftsmanship.
What Features Make a Kitchen Cabinet Degreaser the Best Choice?
The best kitchen cabinet degreasers before painting possess several key features that enhance their effectiveness and ease of use.
- Powerful Degreasing Ability: A top-quality degreaser should effectively break down and remove tough grease and grime that accumulates on kitchen cabinets. This ensures a clean surface for painting, allowing the new paint to adhere better and last longer.
- Non-Toxic Ingredients: Opting for a degreaser made from non-toxic and biodegradable ingredients is essential for maintaining a safe environment, especially in kitchens. Such formulations minimize harmful fumes and make it safer to use around food preparation areas.
- Easy Application: The best degreasers come in user-friendly formats such as sprays or wipes, making them simple to apply without the need for extensive scrubbing. This convenience is especially important when preparing large surfaces like kitchen cabinets.
- Fast-Acting Formula: A degreaser that works quickly can save time during preparation. Fast-acting formulas penetrate grease and grime efficiently, allowing for quicker cleaning and less downtime before painting.
- Residue-Free Rinse: A degreaser that rinses clean without leaving any residue is crucial to ensure that no film interferes with paint adhesion. Residue can cause paint to peel or bubble, leading to an unsatisfactory finish.
- Versatile Use: The best degreasers can often be used on various surfaces beyond just kitchen cabinets, such as appliances and countertops. This versatility provides added value, making it a more economical choice for cleaning throughout the kitchen.
- Streak-Free Finish: A degreaser that leaves a streak-free finish enhances the overall appearance of the cabinets. This is particularly important when preparing surfaces for painting, as any streaks can become visible once the new paint is applied.
How Can You Identify the Most Effective Ingredients in a Cabinet Degreaser?
Identifying the most effective ingredients in a cabinet degreaser is essential for achieving a clean surface before painting.
- Surfactants: Surfactants are key ingredients that reduce surface tension, allowing the degreaser to penetrate and lift grease and grime effectively. They work by breaking down oils and fats, making it easier to wipe away stubborn residues from cabinet surfaces.
- solvents: Solvents in degreasers help dissolve grease and can also evaporate quickly, leaving behind a clean surface. Common solvents include isopropyl alcohol and acetone, which can tackle tough build-up but should be used with caution to avoid damaging finishes.
- Alkaline agents: Alkaline agents, such as sodium hydroxide, are powerful degreasing agents that can break down organic materials and grease. They are particularly effective for heavy-duty cleaning but may require dilution and careful handling to protect surfaces from damage.
- Enzymes: Enzymatic cleaners utilize natural enzymes that break down food particles and grease at a molecular level. These ingredients are gentle on surfaces and eco-friendly, making them ideal for those looking for a less aggressive cleaning option.
- Fragrance and colorants: While not directly related to the cleaning efficacy, fragrances and colorants can enhance the user experience. They provide a pleasant scent during cleaning and can make it easier to see where the product has been applied, although they do not contribute to the degreasing action.
What Steps Should You Follow to Use a Degreaser on Kitchen Cabinets Properly?
To effectively use a degreaser on kitchen cabinets before painting, follow these essential steps:
- Choose the Right Degreaser: Select a degreaser specifically formulated for kitchen surfaces that can effectively cut through grease and grime.
- Prepare the Area: Clear the cabinets of all items and cover surrounding surfaces to protect them from splashes and drips.
- Test the Degreaser: Before applying the degreaser on the entire surface, test it on a small, inconspicuous area to ensure it does not damage the finish.
- Apply the Degreaser: Use a spray bottle or cloth to apply the degreaser generously, focusing on areas with heavy grease buildup.
- Let It Sit: Allow the degreaser to sit for the recommended time, usually a few minutes, to break down the grease effectively.
- Scrub the Surface: Use a soft scrub brush or sponge to gently scrub the cabinets, paying extra attention to tough spots.
- Rinse Thoroughly: After scrubbing, wipe down the cabinets with a clean, damp cloth to remove any residue from the degreaser.
- Dry Completely: Ensure the cabinets are completely dry before proceeding to paint, as moisture can affect paint adhesion.
What Are the Critical Benefits of Using a Degreaser Before Painting Your Cabinets?
The critical benefits of using a degreaser before painting your cabinets include improved paint adhesion, enhanced finish quality, and time and cost savings.
- Improved Paint Adhesion: Using a degreaser effectively removes grease, oils, and other contaminants from the cabinet surface, which are significant barriers to paint adherence. When these residues are eliminated, the paint can bond more effectively to the surface, leading to a longer-lasting and more durable finish.
- Enhanced Finish Quality: A clean surface free from grime ensures that the paint goes on smoothly and evenly. This results in a professional-looking finish without blemishes or imperfections that can occur when dirt or oil is present during the painting process.
- Time and Cost Savings: Properly degreasing cabinets before painting can save time in the long run by reducing the likelihood of needing to repaint sooner due to peeling or chipping. Additionally, it minimizes the expenses associated with purchasing additional paint or labor for touch-ups, making the overall project more cost-effective.
- Health and Safety: Many degreasers are formulated to be safe for indoor use, reducing the risk of harmful fumes that can occur with paint application on unclean surfaces. This creates a healthier environment during the painting process, especially in areas like kitchens where ventilation may be limited.
- Improved Color Consistency: Residues on cabinets can lead to uneven color distribution when painting, which can result in blotches or streaks. A degreaser ensures a uniform surface that allows for consistent color application, enhancing the overall aesthetic appeal of the finished cabinets.
Which Kitchen Cabinet Degreasers Are Recommended by Experts for Painting Prep?
Experts recommend several effective degreasers for preparing kitchen cabinets before painting:
- TSP (Trisodium Phosphate): A powerful cleaner often used in professional settings, TSP effectively removes grease, grime, and old paint residues.
- Krud Kutter: This eco-friendly degreaser is designed to cut through heavy grease and oil, making it suitable for kitchen cabinets.
- Dawn Dish Soap: A simple yet effective option, this dish soap can be mixed with warm water to create a gentle degreasing solution for light cleaning.
- Zep Heavy-Duty Citrus Degreaser: This commercial-grade product utilizes the natural power of citrus to break down tough grease and is safe for most surfaces.
- Simple Green All-Purpose Cleaner: Known for its versatility, Simple Green is a biodegradable cleaner that can tackle grease and is suitable for various kitchen surfaces.
TSP (Trisodium Phosphate): TSP is a highly effective cleaning agent favored by professionals for its ability to strip away tough residues, making it ideal for prepping surfaces for painting. It should be used with caution, as it can be harsh on the skin and requires thorough rinsing to avoid any lingering residue.
Krud Kutter: This degreaser is well-regarded for its non-toxic formula that effectively tackles grease and grime without harmful fumes. It is suitable for various surfaces, including wood and laminate, making it a reliable choice for kitchen cabinets.
Dawn Dish Soap: While not a commercial degreaser, Dawn is praised for its grease-cutting capabilities and is often recommended for light cleaning tasks. When diluted in warm water, it provides a gentle yet effective solution for cleaning cabinets before painting.
Zep Heavy-Duty Citrus Degreaser: Utilizing the natural oils from citrus, this degreaser is not only effective at cutting through grease but also leaves a pleasant scent. It’s ideal for heavy-duty cleaning and is safe for most surfaces, although a patch test is recommended for delicate finishes.
Simple Green All-Purpose Cleaner: This cleaner is known for its biodegradable formula and effectiveness in removing grease from various surfaces. It is versatile enough for use in kitchens and is safe for most painted and unpainted surfaces, making it an excellent choice for cabinet preparation.
What Common Mistakes Should You Avoid When Using a Kitchen Cabinet Degreaser?
When using a kitchen cabinet degreaser before painting, it’s essential to avoid certain common mistakes to ensure the best results.
- Not Testing on a Small Area: Always test the degreaser on a small, inconspicuous area first to check for any adverse reactions. This will help you avoid damaging the finish or wood of your cabinets.
- Skipping Proper Ventilation: Failing to ventilate the area can lead to inhaling harmful fumes from the degreaser. Ensure that windows are open and fans are running to provide adequate airflow during the cleaning process.
- Using the Wrong Product: Not all degreasers are suitable for all surfaces. Make sure to read the label and choose a degreaser that is specifically formulated for kitchen cabinets to avoid any potential damage.
- Neglecting to Rinse Thoroughly: After applying the degreaser, it’s crucial to rinse the cabinets thoroughly with water. Residual degreaser can interfere with paint adhesion, leading to peeling or bubbling once the paint is applied.
- Ignoring Safety Precautions: Always wear gloves and eye protection when using degreasers, as they can be harsh on the skin and eyes. Following safety precautions will help prevent injuries while cleaning.
- Applying Degreaser Directly to the Surface: Instead of spraying degreaser directly onto the cabinets, consider applying it to a cloth first. This technique helps control the amount used and reduces the risk of oversaturating the wood.
- Not Allowing Sufficient Drying Time: After cleaning and rinsing, make sure to allow enough time for the cabinets to dry completely before painting. Painting over damp surfaces can lead to poor adhesion and a flawed finish.
How Do You Ensure Proper Final Cleaning After Using a Degreaser?
Ensuring proper final cleaning after using a degreaser involves several key steps to prepare surfaces for painting.
- Rinse Thoroughly: After applying a degreaser, it’s crucial to rinse the surface with clean water. This step removes any residual degreaser, preventing it from interfering with paint adhesion.
- Use a Clean Cloth: Wiping the surface with a clean, lint-free cloth helps to pick up any remaining dirt or degreaser. This ensures that the surface is completely free of contaminants before painting.
- Check for Residues: Inspect the surface for any signs of remaining grease or degreaser. A quick visual check can help identify areas that may need additional cleaning before proceeding.
- Allow to Dry Completely: After cleaning, allow the surface to dry completely. This is essential because moisture can affect the quality of the paint finish and lead to peeling or bubbling later.
- Use a Primer: Applying a suitable primer can further improve paint adhesion and provide a smooth base for the final coat. Primers help to seal the surface, ensuring that any last remnants of grease or oils are covered.
Rinsing thoroughly after using a degreaser removes any chemical residue that might cause issues with paint adherence. Ensuring the surface is wiped down with a clean cloth is equally important, as it eliminates any lingering dirt that can compromise the final finish.
Checking for residues involves a careful inspection to ensure every area is clean, as missed spots can lead to poor results. Allowing the surface to dry completely is crucial, as any moisture can adversely affect the paint’s performance and durability.
Finally, applying a primer not only enhances adhesion but also smooths out imperfections, ensuring an even application of paint and a professional-looking finish.
Related Post: