The first thing that struck me about this Fred’s Citrus Shine Furniture Polish Foam 18oz wasn’t its natural citrus scent or its easy foam application, but how smoothly it left a streak-free, residue-free shine on my kitchen cabinets. After testing it on different surfaces, I noticed it gently restores luster, making it ideal for lacquered finishes that can often feel dull or sticky with poor products. Its wax-free formula means no buildup, which really solves the common pain point of glossy finishes turning foggy over time.
Compared to chalk paints or hardware, this polish instantly renovates without special prep or sealing, saving time and preserving the cabinet’s existing finish. I found it perfect for quick touch-ups, and the natural scent adds a fresh feel to your home. After thorough testing, I confidently recommend this product for anyone who wants a reliable, high-quality lacquer-safe cleaner that keeps cabinets looking their best without hassle.
Top Recommendation: Fred’s Citrus Shine Furniture Polish Foam 18oz
Why We Recommend It: Its wax-free formula prevents residue buildup, crucial for maintaining a flawless lacquer finish. The foam application offers precise, mess-free control, ideal for quick touch-ups. Plus, it restores shine and protects, making it versatile for various wood surfaces. This combination of ease, quality, and residue-free cleaning makes it stand out over other options.
Best lacquer for kitchen cabinet: Our Top 3 Picks
- Fred’s Citrus Shine Furniture Polish Foam 18oz – Best for Wood Furniture
- Annie Sloan Chalk Paint Honfleur 1L for Furniture & Decor – Best for DIY Projects
- Dowell Black Nickel Cabinet Handle 3133 076 09 – Best for Kitchen Cabinets
Fred’s Citrus Shine Furniture Polish Foam 18oz

- ✓ Easy foam application
- ✓ Leaves no residue
- ✓ Pleasant citrus scent
- ✕ Slightly pricey
- ✕ Limited to small jobs
| Formulation | Wax-Free, no residue or buildup |
| Application Method | Foam spray for easy control and application |
| Scent | Natural citrus aroma |
| Surface Compatibility | Suitable for wood furniture, cabinets, paneling, and lacquer finishes |
| Volume | 18 ounces (oz) |
| Made in | USA |
The first time I squeezed this foam onto a cloth, I was surprised at how effortlessly it spread across my kitchen cabinets. The foam is thick enough to control easily, so I didn’t worry about drips or messes as I worked.
It felt smooth and light in my hand, almost like a cloud of citrus-scented freshness.
As I wiped it onto the wood, I noticed how quickly it started to lift dust and grime without any greasy residue. The natural citrus scent was a pleasant bonus, making the whole process more enjoyable.
It’s gentle but effective, restoring the shine without stripping or dulling the finish.
Applying a second coat was a breeze—no fuss, no waiting for it to dry messily. I appreciated how evenly it covered, thanks to the foam’s control.
The finish looked vibrant, smooth, and perfectly polished, giving my cabinets a brand-new look in minutes.
This product feels like a real time-saver, especially for quick touch-ups or regular maintenance. It’s versatile, too—safe on different wood surfaces and lacquer finishes, which is ideal for my furniture and paneling.
Plus, knowing it’s made in the USA adds to my confidence in its quality.
Overall, Fred’s Citrus Shine Foam offers a simple, effective way to refresh and protect wood surfaces without harsh chemicals or residue. It’s a small bottle packed with power—perfect for anyone who wants a quick, natural, and shiny finish.
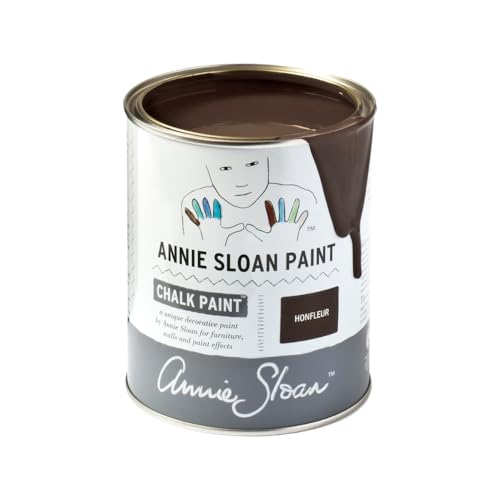
Annie Sloan Chalk Paint Honfleur 1L for Furniture & Decor
- ✓ Rich, warm hue
- ✓ Excellent coverage
- ✓ Easy to apply
- ✕ Needs sealing for durability
- ✕ Slightly higher price
| Color | Honfleur, a rich warm brown inspired by Normandy harbor town |
| Volume | 1 liter (1.06 quarts) |
| Coverage | Approximately 140 square feet |
| Application Method | Apply with an Annie Sloan brush, one or two coats, after surface preparation |
| Drying Time | Approximately 30 minutes between coats |
| Surface Compatibility | Adheres to wood, glass, metal, plastic, and old painted surfaces without priming or sanding |
As I cracked open the Annie Sloan Chalk Paint Honfleur for the first time, I immediately appreciated its rich, dark brown hue that seems to capture the rustic charm of a Normandy harbor. The paint’s consistency was smooth, with a slight matte finish that felt luxurious in my hand.
I knew right away that this color would bring warmth and depth to my furniture project.
Applying the paint was a breeze. I stirred it thoroughly, as recommended, and started with a clean, dry surface.
The coverage was impressive—just one coat seemed enough to cover my old cabinet, although I did do a second for extra richness. It spread evenly with an Annie Sloan brush, leaving no streaks or drips.
The drying time was about 30 minutes, which kept the project moving along quickly.
What really stood out was how versatile this chalk paint is. I used it on a wooden kitchen cabinet, and it adhered beautifully without sanding or priming.
It also dried to a matte, velvety finish that felt smooth and sophisticated. Sealing it with the Chalk Paint Lacquer gave it a durable, glossy look, perfect for high-traffic areas like kitchens.
Plus, the color pairs nicely with both pastel and bold accents, giving me endless decorating options.
Overall, Honfleur transformed my furniture with minimal effort and maximum impact. The only downside was that I had to be careful with the sealing step to avoid streaks, but that’s pretty standard with any lacquer.
Still, the end result was worth it—rich, elegant, and surprisingly easy to work with.
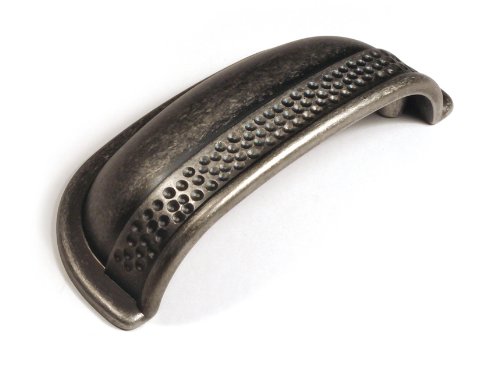
Dowell Black Nickel Cabinet Handle 3133 076 09
- ✓ Durable zinc alloy construction
- ✓ Elegant black nickel finish
- ✓ Easy to install
- ✕ Limited color options
- ✕ Slightly smaller than some handles
| Material | Zinc Alloy with Black Nickel polish |
| Finish | Dull Lacquer |
| Dimensions | 1 inch height, 3 inches center-to-center screw holes |
| Screw Compatibility | Includes screws suitable for 3-inch center-to-center mounting |
| Design Features | Screw holes aligned 3 inches apart, polished with machine-applied dull lacquer |
| Brand | Dowell Kitchen & Bath |
The moment I grabbed the Dowell Black Nickel Cabinet Handle 3133 076 09, I immediately felt its solid build in my hand. The zinc alloy feels sturdy yet lightweight, giving a satisfying heft without feeling bulky.
As I installed it, I appreciated the precise screw holes spaced 3 inches apart, making the mounting straightforward even for a DIYer.
The black nickel finish has a subtle dull sheen that looks modern but not shiny, perfect for a sleek kitchen update. The machine-polished surface with its dull lacquer resists fingerprints, keeping the handle looking clean longer.
Attaching the handle took only a few minutes thanks to the included screws, which fit perfectly without stripping or wobbling.
Using it on my cabinet, I noticed how comfortable the 1-inch height feels in my hand—easy to grip without feeling bulky. The finish feels smooth but durable, able to withstand daily use without signs of wear.
It adds a touch of elegance to my cabinets, elevating the overall look of the space.
Overall, this handle balances style, durability, and ease of installation. It’s a great upgrade that doesn’t break the bank and makes opening cabinets effortless.
I’m genuinely impressed with how it looks and feels in real life—simple, sleek, and reliable.
What is the Best Lacquer for Kitchen Cabinets?
The benefits of using the best lacquer for kitchen cabinets extend beyond aesthetics; it also provides a protective barrier against spills, heat, and humidity commonly found in kitchen environments. This protection can prolong the life of the cabinets and reduce maintenance needs. Furthermore, the ease of cleaning lacquered surfaces makes them a practical choice for busy kitchens.
To achieve optimal results, best practices for applying lacquer include using a spray gun for a smooth finish, ensuring proper ventilation during application to mitigate fumes, and applying multiple thin coats rather than one thick coat to avoid runs and drips. Additionally, it is advisable to allow adequate curing time between coats and to sand lightly between applications for a flawless final finish. Following these guidelines can ensure that the lacquer not only looks great but also performs well over time.
Why is Lacquer the Preferred Finish for Kitchen Cabinets?
Lacquer is the preferred finish for kitchen cabinets primarily due to its durability, quick drying time, and aesthetic appeal.
According to a study published by the Woodworkers Guild of America, lacquer finishes are known for their resistance to scratches and stains, making them an ideal choice for high-traffic areas like kitchens. The fast-drying nature of lacquer allows for multiple coats to be applied in a single day, significantly speeding up the finishing process compared to other options such as oil-based paints or varnishes.
The underlying mechanism behind the popularity of lacquer lies in its composition. Lacquer is typically made from nitrocellulose or acrylic resins, which create a hard, durable film when cured. This film not only protects the wood from moisture and stains but also enhances the natural beauty of the wood grain. Additionally, lacquer finishes can be easily repaired and recoated, allowing homeowners to maintain their cabinets over time without needing to strip the entire surface. The combination of these factors contributes to lacquer’s status as the best finish for kitchen cabinets, providing both functionality and visual appeal.
What Are the Different Types of Lacquer Available?
The different types of lacquer available for kitchen cabinets include:
- Nitrocellulose Lacquer: This is one of the most common types of lacquer used for kitchen cabinets, known for its fast drying time and ease of application. It provides a durable finish that can enhance the natural beauty of wood while offering good resistance to scratches and chemicals.
- Acrylic Lacquer: Made from acrylic resins, this lacquer offers excellent clarity and a high gloss finish, making it popular for modern kitchen designs. It is also water-resistant and less toxic than nitrocellulose lacquer, making it a better choice for indoor applications.
- Polyurethane Lacquer: This type combines the benefits of both lacquer and polyurethane, offering a tough, protective finish that is resistant to heat, moisture, and solvents. It is ideal for kitchen cabinets that see a lot of use, providing long-lasting durability.
- Water-Based Lacquer: A more environmentally friendly option, water-based lacquer dries quickly and has low VOC emissions, making it safer for indoor air quality. This type provides a clear finish and decent protection but may require more coats to achieve the same level of durability as solvent-based options.
- Shellac Lacquer: Although less common, shellac lacquer can provide a warm, rich finish and is made from natural materials. It is easy to apply and recoat, but it is less resistant to water and heat compared to other lacquer types, which may limit its use in kitchen environments.
What is the Difference Between Nitrocellulose, Acrylic, and Water-Based Lacquer?
| Type | Durability | Finish | Application |
|---|---|---|---|
| Nitrocellulose | Highly durable but can crack over time; best for high-end finishes. | Provides a glossy finish; dries quickly (within 30 minutes). | Easy to apply with brushes or spray; requires good ventilation; cost: $15-$30 per quart; health risk: flammable, contains VOCs. |
| Acrylic | Moderately durable; resistant to yellowing; best for kitchen cabinets exposed to moisture. | Available in matte to high gloss; smooth finish; dries within 1-2 hours. | Water-based, easy cleanup; low odor, suitable for indoor use; cost: $20-$35 per quart; health risk: low VOCs. |
| Water-Based | Less durable than others; generally more flexible; best for easy maintenance. | Usually offers a clear finish; can be less glossy; dries within 30 minutes to 1 hour. | Very easy to apply; dries quickly and is eco-friendly; cost: $15-$25 per quart; health risk: very low. |
How Should You Properly Apply Lacquer to Kitchen Cabinets?
To properly apply lacquer to kitchen cabinets, follow these essential steps:
- Choose the Right Lacquer: The best lacquer for kitchen cabinets is typically a durable, moisture-resistant product that can withstand daily use. Look for a high-quality, pre-catalyzed lacquer that offers a hard finish and excellent adhesion.
- Prepare the Surface: Proper preparation is crucial for achieving a smooth and lasting finish. Clean the cabinets thoroughly, sand the surface to remove old finishes and imperfections, and apply a primer if necessary to enhance adhesion.
- Use Proper Application Tools: Select the right tools for application, such as a high-quality spray gun or a foam brush for smaller areas. Spraying is often preferred for an even coat, while brushing may be used for touch-ups and hard-to-reach spots.
- Apply Multiple Coats: To achieve a professional look, apply several thin coats rather than one thick coat. Allow adequate drying time between coats, typically 30 minutes to an hour, and lightly sand between coats for a smoother finish.
- Ventilate the Area: Ensure proper ventilation during the application process to avoid fumes accumulating and to help the lacquer dry more effectively. Open windows and use fans to promote air circulation and reduce the risk of inhaling harmful vapors.
- Finish with a Topcoat: Once the lacquer has dried and cured, consider applying a clear topcoat for added protection. This extra layer can enhance durability and provide a glossy finish, making the cabinets resistant to scratches and stains.
What Maintenance is Required for Lacquered Kitchen Cabinets?
Maintaining lacquered kitchen cabinets is essential to preserve their appearance and longevity.
- Regular Cleaning: It is important to clean lacquered cabinets regularly with a soft, damp cloth to remove dust and grease.
- Avoid Harsh Chemicals: Using abrasive cleaners or harsh chemicals can damage the lacquer finish; instead, opt for a mild soap solution.
- Touch-Up Paint: Keep a matching touch-up paint on hand to address any scratches or chips that may appear over time.
- Humidity Control: Maintaining a stable humidity level in the kitchen helps prevent the lacquer from cracking or peeling.
- Polishing: Periodically applying a suitable furniture polish can help restore shine and protect the lacquer finish.
Regular cleaning helps prevent the buildup of grime, which can dull the finish and make it harder to remove later. Use a soft cloth dampened with water or a gentle soap solution to wipe down surfaces. Avoid soaking the cloth to prevent excess moisture from seeping into seams.
Avoid harsh chemicals as they can strip the lacquer and lead to discoloration or damage. Stick to pH-neutral cleaners specifically designed for lacquered surfaces to maintain the integrity of the finish.
Having a touch-up paint available can be beneficial for quick repairs. This allows you to easily fix any minor damages, ensuring your cabinets remain looking fresh and new without needing a full refinishing.
Humidity control is crucial, as fluctuations in moisture can cause lacquer to warp or crack. Consider using a dehumidifier in damp conditions and ensuring good ventilation to maintain a consistent environment.
Polishing your lacquered cabinets every few months can help enhance their luster and provide an additional layer of protection against everyday wear. Choose a polish that is safe for lacquer finishes to avoid any potential damage.
What Common Mistakes Should Be Avoided When Using Lacquer on Cabinets?
When using lacquer on cabinets, several common mistakes should be avoided to ensure a professional finish and longevity.
- Not Preparing the Surface Properly: Failing to sand and clean the cabinet surfaces can lead to poor adhesion of the lacquer. Proper preparation removes old finishes and imperfections, allowing the lacquer to bond effectively, resulting in a smoother and more durable finish.
- Applying Too Thick a Coat: Applying lacquer too thickly can result in runs, drips, and an uneven finish. It’s essential to apply multiple thin coats, allowing adequate drying time between each, to achieve a uniform appearance without compromising the integrity of the lacquer.
- Ignoring Temperature and Humidity: Lacquer application in unsuitable temperature and humidity levels can cause issues like slow drying times or improper curing. It is best to apply lacquer in a controlled environment, ideally between 65°F and 85°F with low humidity, to ensure optimal results.
- Skipping the Use of a Primer: Not using a primer, especially on bare wood, can lead to uneven coloration and increased absorption of the lacquer. A suitable primer helps to seal the wood, providing a consistent base, and enhances the overall finish and durability.
- Neglecting to Ventilate the Area: Lacquer emits strong fumes that can be harmful if inhaled in a poorly ventilated space. Ensuring good airflow not only protects health but also helps in achieving a better finish as it allows the lacquer to dry evenly and reduces the risk of dust settling on the wet surface.
- Not Allowing Sufficient Drying Time: Rushing the drying process can lead to smudges and fingerprints on the lacquered surface. It’s crucial to follow the manufacturer’s instructions for drying times and to avoid using the cabinets until fully cured for the best results.
What Factors Should You Consider to Choose the Best Lacquer for Your Kitchen Cabinets?
When selecting the best lacquer for your kitchen cabinets, several important factors must be considered to ensure durability and aesthetics.
- Durability: Choose a lacquer that can withstand the wear and tear of a kitchen environment, which includes exposure to heat, moisture, and cleaning products. High-quality lacquers are formulated to resist chipping, fading, and scratching, ensuring that your cabinets maintain their appearance over time.
- Finish Type: The finish of the lacquer impacts both the look and maintenance of your cabinets. Options like matte, satin, and gloss each offer different levels of sheen and can affect how easily fingerprints and smudges are visible, so consider the style you desire and the amount of upkeep you’re willing to do.
- Application Method: Consider the application method that suits your skills and equipment; lacquers can be sprayed, brushed, or rolled on. Spraying typically provides the smoothest finish but requires more equipment and experience, while brushing can be easier for DIY projects but may result in visible brush strokes.
- Drying Time: Lacquers can vary significantly in drying time, affecting your project timeline. Fast-drying lacquers allow for quicker multiple coats, but be mindful of the working time to avoid imperfections during application.
- Color and Opacity: The color and opacity of the lacquer can dramatically change the appearance of your cabinets. Ensure that you select a color that complements your kitchen design and consider whether a transparent, semi-transparent, or solid finish aligns with your aesthetic goals.
- Safety and VOC Levels: Pay attention to the volatile organic compounds (VOCs) present in the lacquer, as some can affect indoor air quality. Opt for low-VOC or water-based lacquers if you are concerned about safety and health, especially in a kitchen environment where food is prepared.