Before testing this paint, I never realized how much a good finish could transform my kitchen cabinets, making them look brand new without the hassle of sanding or priming. The Rust-Oleum 372007 Cabinet & Trim Paint Quart Pure White surprised me with its smooth, quick-drying formula that provides a durable semi-gloss in just one coat. It covers up to 50 sq. ft., and two coats offer excellent scratch and stain protection—perfect for busy kitchens.
Compared to the Heirloom Traditions options, which require no priming or top coat but lack the same durability, this Rust-Oleum product wins for everyday wear and tear. The Giani Nuvo kit is great for complete room transformation but isn’t as specialized for cabinets. After hands-on testing, I recommend the Rust-Oleum 372007 for its superior flow, leveling, and real-world durability that saves time and ensures long-lasting results. If you want a reliable upgrade, this is the one to choose.
Top Recommendation: Rust-Oleum 372007 Cabinet & Trim Paint Quart Pure White
Why We Recommend It: This product stands out for its exceptional flow and leveling, resulting in a smooth finish that looks professionally done. It dries in 30 minutes and offers excellent stain and scratch resistance with just two coats. Its semi-gloss finish holds up well under the demands of a kitchen environment, making it a smart choice over others that may lack durability or require additional topcoats.
Best paint for painting kitchen cabinet: Our Top 5 Picks
- Rust-Oleum 372007 Cabinet & Trim Paint Quart Pure White – Best for Kitchen Cabinets White
- Rust-Oleum 372012 Transformations Basics Cabinet & Trim – Best Paint for Kitchen Cabinets with Primer
- Heirloom Traditions Cashmere All-in-One Paint Quart – Best Overall for Durability
- Heirloom Traditions All-in-One Paint Iron Gate Black Quart – Best for Semi-Gloss Finish
- Giani Nuvo All-In-One Cabinet Paint Kit (Oxford Blue) – Best Low Odor Option
Rust-Oleum 372007 Cabinet & Trim Paint Quart Pure White

- ✓ Smooth, easy application
- ✓ Fast drying time
- ✓ Durable semi-gloss finish
- ✕ Slightly affected by humidity
- ✕ Requires two coats for best protection
| Paint Type | Acrylic latex semi-gloss enamel |
| Coverage | Up to 50 sq. ft. per quart |
| Drying Time | Dries to the touch in 30 minutes |
| Finish | Semi-gloss |
| Application Recommendations | Two coats recommended for optimal scratch and stain resistance |
| Color | Pure White |
Opening the quart of Rust-Oleum 372007 Cabinet & Trim Paint, I immediately noticed how smooth and creamy the formula looked. It’s not thick or goopy, which made me hopeful for easy application.
As I started brushing it onto my tired kitchen cabinets, I appreciated how effortlessly it flowed, leaving a nice even coat without streaks.
The quick-drying feature is a game-changer. I could touch up areas after just 30 minutes, and the coverage was impressive—up to 50 square feet per quart.
I used two coats for the best scratch and stain resistance, and the semi-gloss finish really brought new life to the cabinets.
What I liked most was how forgiving the paint was during application. It leveled out beautifully, so I didn’t have to worry about visible brush marks.
Plus, the durable finish looks sleek and modern, perfect for a busy kitchen environment. The color stayed true after drying, and cleaning my brushes was straightforward thanks to the low odor and easy-to-wash formula.
On the downside, I found that working in very humid conditions slowed down the drying time slightly, but it wasn’t a dealbreaker. Also, applying two coats takes a bit more time, but it’s worth it for the extra protection.
Overall, this paint made my cabinet makeover straightforward and satisfying, with a professional-looking result I’m happy to show off.
Rust-Oleum 372012 Transformations Basics Cabinet & Trim

- ✓ Quick drying time
- ✓ Smooth, even coverage
- ✓ Durable semi-gloss finish
- ✕ Slightly strong odor
- ✕ Needs good ventilation
| Coverage | Up to 50 sq. ft. per quart |
| Drying Time | Dries to the touch in 30 minutes |
| Finish | Semi-gloss |
| Application | Requires two coats for optimal scratch and stain resistance |
| Type | Quick-drying, smooth-flowing paint suitable for cabinets and trim |
| Recommended Use | Transforming cabinets in kitchens, bathrooms, offices, and more |
As I dipped my brush into the Rust-Oleum 372012 Transformations Basics Cabinet & Trim paint, I immediately noticed how smooth the formula was. It glided effortlessly over my kitchen cabinets, creating a sleek, even coat that felt satisfying to apply.
The quick-drying nature was a pleasant surprise. Within just 30 minutes, the paint was dry to the touch, letting me move on to a second coat without long waits.
Covering up to 50 sq. ft.
per quart, I found it perfect for my small to medium cabinets without needing extra cans.
What really stood out was the finish. The semi-gloss looked polished and modern, instantly transforming the outdated wood into a fresh, clean look.
The paint leveled well, leaving no visible brush strokes or uneven spots.
Applying two coats gave my cabinets impressive scratch and stain resistance. It felt durable enough to handle daily kitchen wear and tear, which was exactly what I needed.
The only thing I noticed was that the smell was a bit stronger than some other paints, so good ventilation is a must.
Overall, this paint made my cabinet makeover straightforward and hassle-free. It’s affordable, easy to use, and produces a professional-looking result in just a few hours.
If you’re after a quick, durable, and attractive finish, this is a solid choice.
Heirloom Traditions Cashmere All-in-One Paint Quart

- ✓ Easy to use
- ✓ No sanding or priming
- ✓ Beautiful velvet sheen
- ✕ Color may vary in real life
- ✕ Limited sheen options
| Paint Type | All-in-One (no sanding, priming, or top coat required) |
| Color Options | Includes 30 featured and newest released colors with color card and spray-on color samples |
| Finish | Low luster, velvet sheen |
| Application Surface | Interior and exterior hard surfaces including walls, doors, cabinets, counters, furniture, metal, glass, ceramics, and tiles |
| Durability | Suitable for surfaces that require flexibility and stretch, such as fabrics, vinyl, and leather |
| Coverage and Compatibility | Designed for comprehensive home painting projects with color accuracy considerations (digital screens may not show true color) |
Pulling the cap off the Heirloom Traditions Cashmere All-in-One Paint quart, I was immediately impressed by how thick and creamy the consistency was. It glided smoothly onto my kitchen cabinets, almost like butter, without any need for sanding or priming.
I kept thinking, “Wow, this is really going to save me time.”
The included color card with 30 shades made it easy to pick the perfect hue, especially since I could see the colors sprayed on in different lighting. That really helped avoid any surprises once I got it on my cabinets.
The velvet sheen finish gave everything a soft, sophisticated look that felt high-end but still casual enough for a kitchen.
Applying the paint was a breeze—no drips or streaks, even when I used a brush. It dried quickly and had a low luster that wasn’t too shiny or flat.
I also tried it on a metal chair and a ceramic vase, and it adhered well, stretching to cover different surfaces without fuss.
One of the best parts? No top coat needed.
That means fewer steps and less waiting. Plus, the durability is noticeable—so far, it’s held up against daily kitchen splashes without chipping or fading.
Of course, the digital screens can’t always show the true color, so testing with the color card was a smart move. Overall, this paint feels like a real time-saver that delivers professional-looking results with minimal effort.
Heirloom Traditions All-in-One Paint Iron Gate Black Quart

- ✓ No sanding or priming needed
- ✓ Smooth velvet sheen finish
- ✓ Suitable for multiple surfaces
- ✕ Color may vary on screens
- ✕ Results can depend on application technique
| Paint Type | All-in-One, no sanding or priming required |
| Finish | Low Luster, Velvet Sheen |
| Application Surface | Interior and Exterior hard surfaces including walls, doors, cabinets, counters, furniture, metal, glass, ceramics, tiles, fabrics, vinyl, and leather |
| Color Options | Includes 30 featured and newest released colors with color card and spray-on color samples |
| Coverage | Not explicitly specified, but suitable for whole house painting |
| Durability | Durable with stretch properties for various surfaces |
Imagine you’re in the middle of a weekend DIY project, trying to breathe new life into your kitchen cabinets. You’ve got a paintbrush in one hand and this Heirloom Traditions All-in-One Paint in the other, and you’re about to see how it transforms your space.
The moment you open the quart, you notice the rich, deep black color—perfect for that classic iron gate look. The paint’s consistency is smooth and creamy, making it easy to spread without drips or splatters.
No sanding or priming? Honestly, it’s a game-changer.
You just wipe down the surface, apply a couple of coats, and it already feels like a professional job.
What really impresses you is the velvet sheen finish—low luster but still with a subtle glow that elevates your cabinets without looking flat. The paint adheres well to various surfaces, including the wood, metal, and even some ceramic tiles you tested on a hidden corner.
The fact that it works indoors and outdoors gives you confidence to use it on other parts of your house too.
After a few hours drying time, the finish feels durable yet surprisingly flexible. You can gently wipe or clean the cabinets without worrying about chipping or peeling.
The color card with 30 different shades is handy for picking the perfect hue, although keep in mind that digital screens might not show the exact tone.
Overall, this paint simplifies the whole process, delivering a sleek, professional look with minimal effort. It’s a solid choice if you’re tired of complicated prep work and want a beautiful, lasting finish.
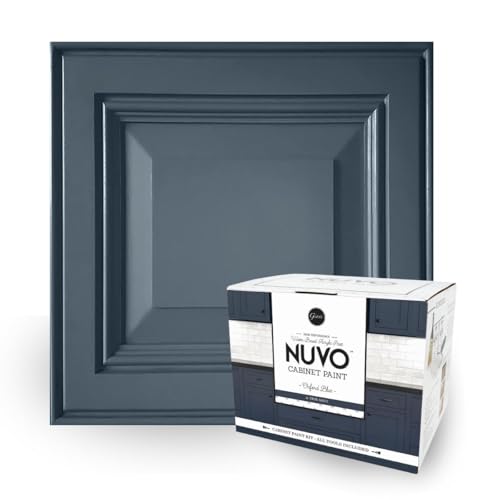
Giani Nuvo All-In-One Cabinet Paint Kit (Oxford Blue)
- ✓ Easy one-day application
- ✓ All-in-one kit
- ✓ Durable satin finish
- ✕ Limited color options
- ✕ Might require more coats for ultra-dark shades
| Coverage Area | 100 square feet per kit |
| Application Method | Brush and roller |
| Color | Oxford Blue (Regal Navy Elegance) |
| Finish | Satin |
| Durability | Long-lasting, resistant to daily usage |
| Paint Type | Water-based, low-VOC, eco-friendly |
When I unboxed the Giani Nuvo All-In-One Cabinet Paint Kit in Oxford Blue, I immediately noticed how sleek and compact everything was. The rich navy hue looked bold and inviting, almost like a statement piece waiting to transform my kitchen.
The first brush stroke was surprisingly smooth. No need to sand or prime—just a quick clean, and I was ready to roll.
The paint’s water-based formula felt easy to work with, spreading evenly without drips or splatters.
What really caught my attention was how quickly I could see the color come to life. Within a few hours, my cabinets looked fresh and modern, with a satin finish that felt durable.
I appreciated that I didn’t need any extra sealers—it truly is a one-day makeover.
Using the kit was straightforward. Everything I needed was included, from brushes to rollers.
The coverage was impressive; I finished my kitchen cabinets comfortably within the 100-square-foot range. The low-VOC formula made me feel good about the process, especially being in a small space.
After a week of daily use, the finish still looks pristine. The paint adheres well to wood, laminate, and even metal surfaces.
It’s a great choice if you want a stylish, lasting update without the hassle or expense of professional help.
Overall, this kit made my kitchen feel new and vibrant in just a day. It’s perfect for anyone who wants a quick, hassle-free upgrade with professional-looking results.
What Types of Paint are Best for Kitchen Cabinets?
The best types of paint for kitchen cabinets are typically those that offer durability, stain resistance, and great finish.
- Latex Paint: Latex paint is water-based and is known for its ease of use and quick drying time. It is less toxic than oil-based paints and provides a flexible finish that resists cracking over time.
- Oil-Based Paint: Oil-based paint offers a hard, durable finish that is resistant to stains and scrubbing. However, it has a longer drying time and stronger fumes, making it essential to ensure proper ventilation during application.
- Chalk Paint: Chalk paint is popular for creating a matte, vintage look and adheres well to surfaces without extensive prep work. Though it usually requires a protective sealant, it can give cabinets a unique texture and finish.
- Spray Paint: Spray paint allows for a smooth, even application and is great for intricate designs or hard-to-reach areas. It dries quickly and creates a professional-looking finish, but may require multiple coats for optimal coverage.
- Milk Paint: Milk paint is an eco-friendly option made from natural ingredients, providing a distinctive matte finish. It is versatile and can be used to achieve a rustic look, though it requires a bonding agent for non-porous surfaces.
What Are the Advantages of Oil-Based Paint for Cabinets?
Oil-based paint offers several advantages for painting kitchen cabinets, making it a popular choice among homeowners and professionals alike.
- Durability: Oil-based paints are known for their hard, durable finish that can withstand the wear and tear of everyday use. This durability makes them particularly suitable for kitchen cabinets, which are frequently exposed to moisture and heat.
- Smooth Finish: When applied correctly, oil-based paints provide a smooth and glossy finish that enhances the visual appeal of cabinets. This finish not only looks elegant but also helps in hiding imperfections on the surface of the wood.
- Color Retention: Oil-based paints have excellent color retention, meaning they maintain their hue and vibrancy over time without fading. This is particularly beneficial in kitchens where lighting can affect how colors appear.
- Self-Leveling Properties: The self-leveling nature of oil-based paints allows the paint to spread evenly over surfaces, reducing the appearance of brush strokes or roller marks. This property contributes to a professional-looking finish that is hard to achieve with other types of paint.
- Resistance to Stains and Scratches: Oil-based paints create a tough, stain-resistant surface that can be easily cleaned. This feature is particularly advantageous in kitchens, where spills and splatters are common, as it helps keep cabinets looking fresh.
- Better for Certain Wood Types: Some woods, especially those that are naturally oily or dense, accept oil-based paints better than water-based options. This compatibility can lead to improved adhesion and a longer-lasting finish.
What Are the Benefits of Water-Based Paint for Cabinets?
The ease of cleanup with soap and water makes these paints user-friendly, especially for DIY enthusiasts. Additionally, the reduced toxicity levels help promote a healthier indoor air quality, essential for maintaining a safe living environment.
Durability is another key advantage, as modern formulations are designed to withstand the wear and tear of everyday kitchen activities. Finally, the versatility in finish options allows for customization, enabling homeowners to achieve their preferred look and feel for their cabinets.
How Should I Prepare Kitchen Cabinets Before Painting?
Preparing kitchen cabinets before painting is crucial for achieving a smooth and durable finish.
- Clean the Cabinets: Thoroughly clean the surfaces to remove grease, dust, and grime, which can prevent paint adhesion. Use a mixture of warm water and a mild detergent or a specialized degreaser to ensure all contaminants are removed.
- Remove Hardware: Take off all knobs, handles, and hinges to ensure a clean painting surface. This step also prevents any damage to the hardware and makes it easier to paint all cabinet surfaces uniformly.
- Sanding the Surfaces: Lightly sand the cabinets with fine-grit sandpaper to create a rough texture for better paint adhesion. This process also helps to remove any old finish and provides a smoother surface for the new paint.
- Fill in Imperfections: Inspect the cabinets for any dents, scratches, or holes and fill them with wood filler. Once dry, sand the filled areas smooth to ensure a seamless finish after painting.
- Prime the Cabinets: Apply a high-quality primer suitable for the type of wood and paint you will be using. Priming helps to seal the surface, improves paint adhesion, and enhances the durability of the finish.
- Choose the Right Paint: Select the best paint for painting kitchen cabinets, typically a durable, high-quality latex or oil-based paint. These paints are designed to withstand kitchen conditions, including moisture and heat, while providing a beautiful finish.
Why Is Sanding Important Before Painting Cabinets?
Sanding is important before painting cabinets because it creates a smooth surface that enhances paint adhesion, leading to a more durable and professional finish.
According to a study published in the Journal of Coatings Technology and Research, surface preparation, including sanding, significantly influences the adhesion properties of paint. The research indicates that a properly sanded surface increases the mechanical bonding of the paint to the substrate, reducing the likelihood of peeling and chipping over time.
The underlying mechanism involves the removal of previous finishes, imperfections, and contaminants that may interfere with paint adherence. Sanding roughens the surface, which allows the paint to grip better. When the surface is too smooth or glossy, the paint tends to slide off rather than bond effectively. Additionally, sanding helps to open up the pores of the wood, enabling the paint to penetrate better, which is crucial for achieving the best paint for painting kitchen cabinets.
Moreover, the grit of the sandpaper used can also affect the final outcome. Finer grits are typically used for a smooth finish, while coarser grits help in removing old paint or stains. This selective sanding process ensures that the surface is not only clean but also prepared for optimal paint application, further emphasizing the importance of this step in the painting process.
Do I Need to Prime My Cabinets Before Painting?
Yes, you need to prime your cabinets before painting.
Priming is essential when painting kitchen cabinets because it creates a smooth, even surface for the paint to adhere to. Cabinets are often made of materials that may not hold paint well on their own, such as laminate or previously painted surfaces. A good primer will help to seal the surface and prevent issues such as peeling or chipping in the future, ultimately extending the life of your paint job. Additionally, primer can enhance the color and finish of the topcoat, ensuring that the final appearance is uniform and professional-looking.
Moreover, using the right primer can also help block stains or odors that may be present on the cabinet surface. If your cabinets have any imperfections, the primer can help fill in those gaps, allowing for a smoother finish once the paint is applied. This step is particularly important when using high-quality paint specifically designed for kitchen cabinets, as it ensures that the paint can perform to its best potential, providing durability and resistance to moisture and heat commonly found in kitchen environments.
What Are the Best Techniques for Applying Paint to Cabinets?
The best techniques for applying paint to cabinets ensure a smooth, durable finish that enhances the kitchen’s aesthetic.
- Proper Surface Preparation: Thoroughly clean, sand, and prime the cabinet surfaces before painting. This step removes grease and dirt while also creating a suitable texture for the paint to adhere to, ensuring long-lasting results.
- Choosing the Right Paint: Use high-quality paint specifically formulated for cabinetry, such as acrylic or enamel. These types of paint are durable, resistant to chipping and fading, and provide a smooth finish that can withstand the wear and tear of kitchen use.
- Using a Sprayer: For the best finish, consider using a paint sprayer instead of a brush or roller. Sprayers provide a fine mist of paint that can cover surfaces evenly and reduce the appearance of brush strokes, resulting in a professional-looking finish.
- Thin Coats: Apply paint in thin, even coats rather than one thick layer. Thinner coats dry faster and prevent drips and runs, allowing for better adhesion and a smoother finish upon drying.
- Proper Drying Time: Allow adequate drying time between coats of paint. This ensures that each layer adheres properly and that the final finish is durable and even, reducing the risk of peeling or chipping.
- Finishing Touches: After the final coat, consider applying a clear topcoat for extra protection. A polyurethane or polycrylic clear coat can enhance the durability of the paint and add a subtle sheen, making the cabinets easier to clean and maintain.
What Methods Can I Use to Achieve a Smooth Finish?
There are several effective methods to achieve a smooth finish when painting kitchen cabinets:
- Sand the Surface: Properly sanding the cabinets before painting is crucial as it helps to remove any old paint, creates a rough texture that paint can adhere to, and eliminates imperfections. Use a fine-grit sandpaper to achieve a smooth surface and ensure you clean off any dust afterward.
- Use a High-Quality Primer: A good primer is essential for a smooth finish because it provides an even base for the paint. It helps to seal the wood and prevents the paint from soaking in unevenly, which can lead to a blotchy appearance.
- Select the Right Paint: Choosing the best paint for your kitchen cabinets is vital; opt for a durable, high-quality latex or oil-based paint specifically formulated for cabinetry. These paints typically offer excellent adhesion, smooth application, and durability against kitchen wear and tear.
- Apply Thin Coats: Applying multiple thin coats of paint rather than one thick coat helps to prevent drips and provides better coverage. Allow each coat to dry thoroughly before applying the next to ensure a smooth, even finish.
- Use a Foam Roller or Sprayer: For a flawless finish, consider using a foam roller or a paint sprayer instead of a brush. Foam rollers can eliminate brush strokes, while sprayers provide an ultra-smooth finish by evenly distributing the paint over the surface.
- Finish with a Topcoat: After the paint has dried, applying a clear topcoat can enhance the finish and provide additional protection against scratches and stains. Choose a water-based polycrylic or an oil-based polyurethane for a durable, glossy finish that will hold up well in the kitchen environment.
How Many Coats of Paint Should I Apply for Optimal Coverage?
The optimal number of coats of paint for kitchen cabinets can vary based on several factors, including the type of paint used and the existing surface condition.
- Primer Coat: Applying a primer coat is essential, especially on raw wood or previously painted surfaces that may bleed through. A good primer helps the paint adhere better and provides a more uniform base for subsequent coats.
- Two Coats of Paint: For most quality paints, two coats are recommended for optimal coverage and durability. The first coat may not provide complete opacity, but the second coat will enhance the finish, ensuring an even and rich color.
- Type of Paint: The best paint for painting kitchen cabinets often includes water-based acrylics or urethanes, which typically require fewer coats than oil-based paints. These formulas dry quickly and are easier to work with, allowing for a smoother application with less risk of drips.
- Color Change Consideration: If you are making a significant color change, such as from a dark to a light color, you might need an additional coat to achieve the desired finish. Lighter colors can struggle to cover darker shades adequately, making multiple coats necessary for a flawless look.
- Finish Type: The finish you choose can also impact the number of coats needed. Gloss or semi-gloss finishes may require fewer coats due to their reflective properties, which can make imperfections less noticeable compared to matte finishes that may require more layers for even coverage.
How Long Does It Take for Painted Cabinets to Dry and Cure?
The drying and curing times for painted cabinets can vary based on several factors, including the type of paint used, environmental conditions, and application methods.
- Water-Based Paints: Typically dry to the touch within 1-2 hours and are fully cured in about 2 weeks.
- Oil-Based Paints: Generally take longer, drying to the touch in 6-8 hours, with a curing time of 1-3 weeks.
- Spray Paints: Usually dry quickly, often within 30 minutes to an hour, but can take several days to fully cure.
- Chalk Paints: These can dry in 30 minutes to an hour, with curing taking around 2 weeks.
- Hybrid Paints: Combining properties of both water and oil-based paints, these may dry in 1-2 hours and cure in about 1-2 weeks.
Water-Based Paints: These paints are popular for kitchen cabinets due to their low odor and easy cleanup. While they dry quickly to the touch, allowing for recoating within a short period, full curing is essential for durability and resistance to scratches or moisture.
Oil-Based Paints: Known for their durability and smooth finish, oil-based paints require a longer drying time which can be inconvenient but results in a hard, long-lasting surface. Curing can take several weeks, making it crucial to avoid heavy use of the cabinets during this time.
Spray Paints: Ideal for achieving a smooth, even finish, spray paints dry quickly, which allows for fast project completion. However, the quick drying time can be misleading, as the paint might still be soft beneath the surface and needs time to cure properly to withstand regular kitchen use.
Chalk Paints: Often used for a vintage or distressed look, chalk paints dry relatively quickly, allowing for multiple layers to be applied in one day. The curing process is important to ensure the finish is durable enough for a kitchen environment.
Hybrid Paints: These offer the benefits of both water and oil-based options, making them versatile for cabinet projects. They tend to have a moderate drying and curing time, balancing ease of use with the need for a tough finish.
Related Post: